Hosted Embedded Signup | Developer Documentation
Hosted Embedded Signup
Updated: Nov 4, 2025
If you don’t want to implement Embedded Signup by adding JavaScript code to your website or customer portal, you can instead use a link that, when clicked, displays a web page describing onboarding steps, and a button that launches the Embedded Signup flow:
Limitations
Hosted Embedded Signup (“Hosted ES”) can only be used to onboard business customers to Cloud API, and the flow cannot be customized.
Requirements
You will also need:
Your system token.Your app secret.
Step 1: Create a Facebook Login for Business configuration
If you don’t already have a Facebook Login for Business configuration, you must create one. A Facebook Login for Business configuration defines which permissions to request, and what additional information to collect, from business customers who access Embedded Signup.
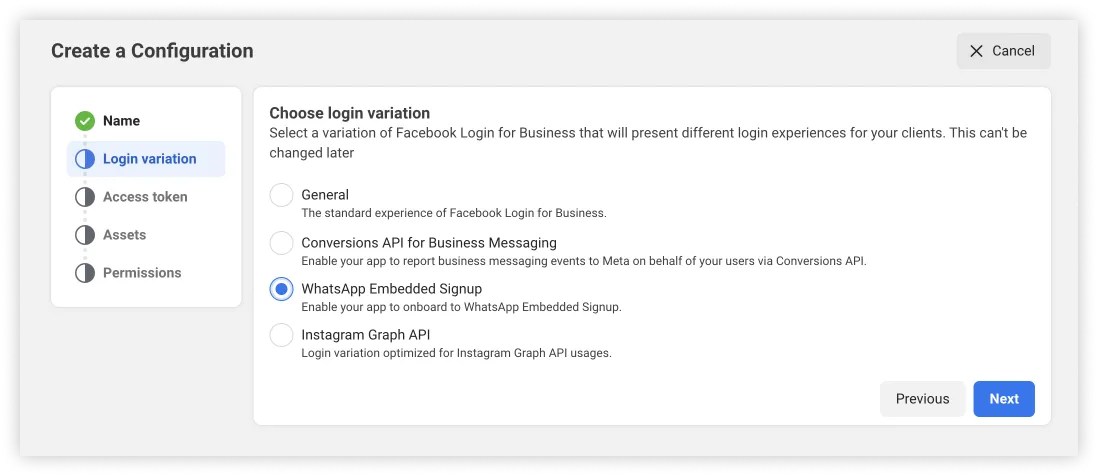
Navigate to Facebook Login for Business > Configurations and click the + Create configuration button to access the configuration flow.
Use a name that will help you differentiate this configuration from any others you may create in the future. When completing the flow, be sure to select the WhatsApp Embedded Signup login variation:
When choosing assets and permissions, select only those assets and permissions that you will actually need from your business customers.
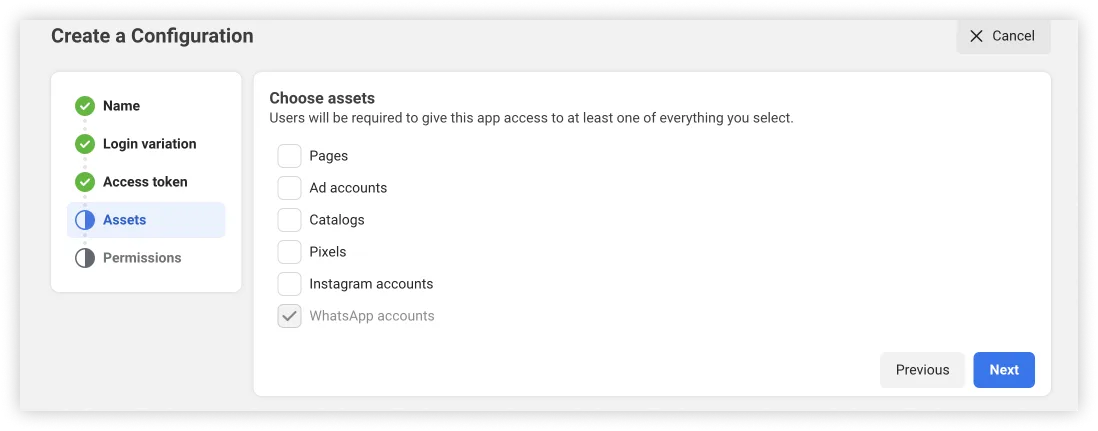
For example, if you select the Catalogs asset but don’t actually need access to customer catalogs, your customers will likely abandon the flow at the catalog selection screen and ask you for clarification.
Step 2: Get the Hosted ES URL
Navigate to the WhatsApp > Quickstart panel and click the View onboarding button.
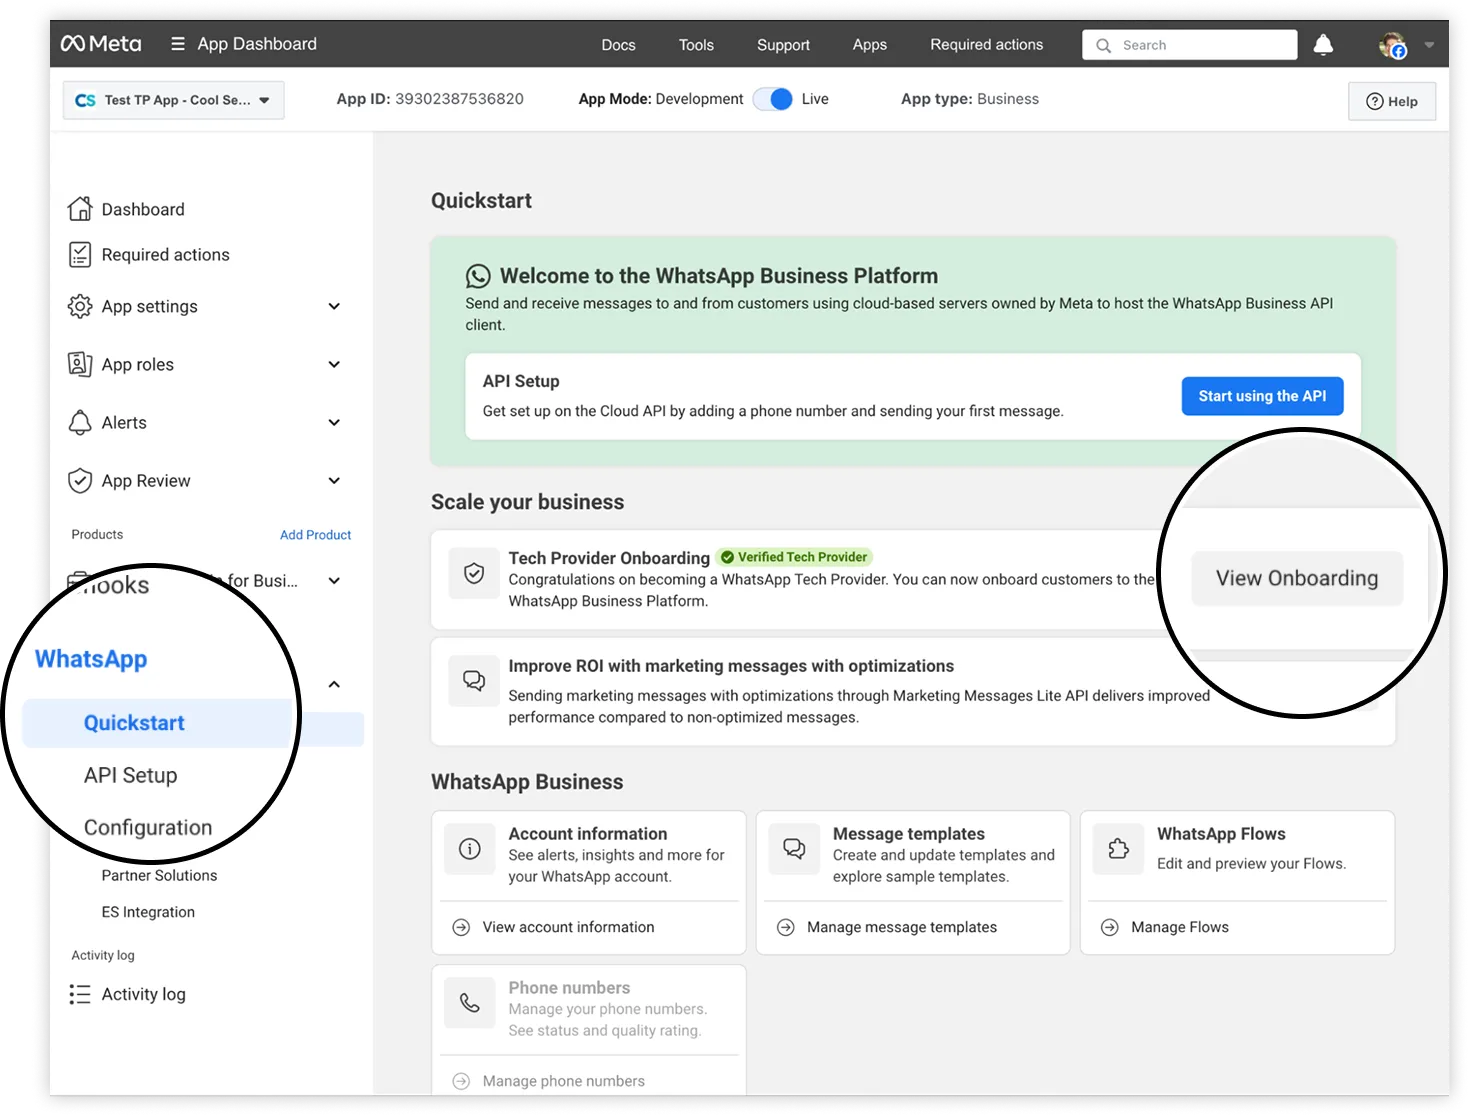
Locate the Zero integration onboarding card. The URL displayed in the card is the onboarding page URL:
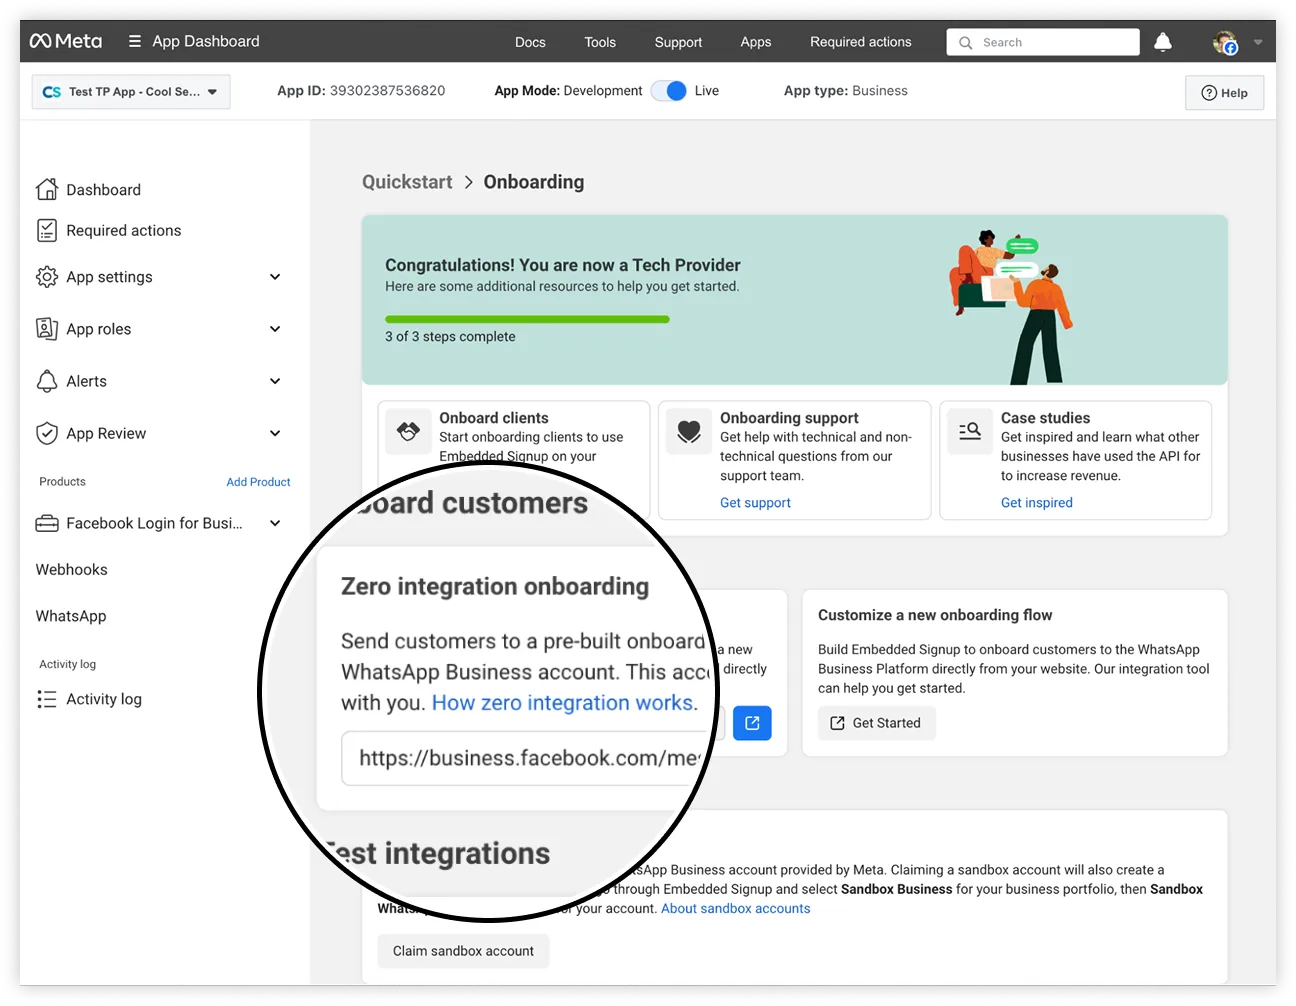
Click the Copy button to copy the URL to your clipboard. Map this URL to a button on your website or customer portal that, when clicked, opens the URL in a new browser window.
To see what this looks like, you can load the URL in a new browser window or tab, or click the blue “new window” icon, which does the same thing.
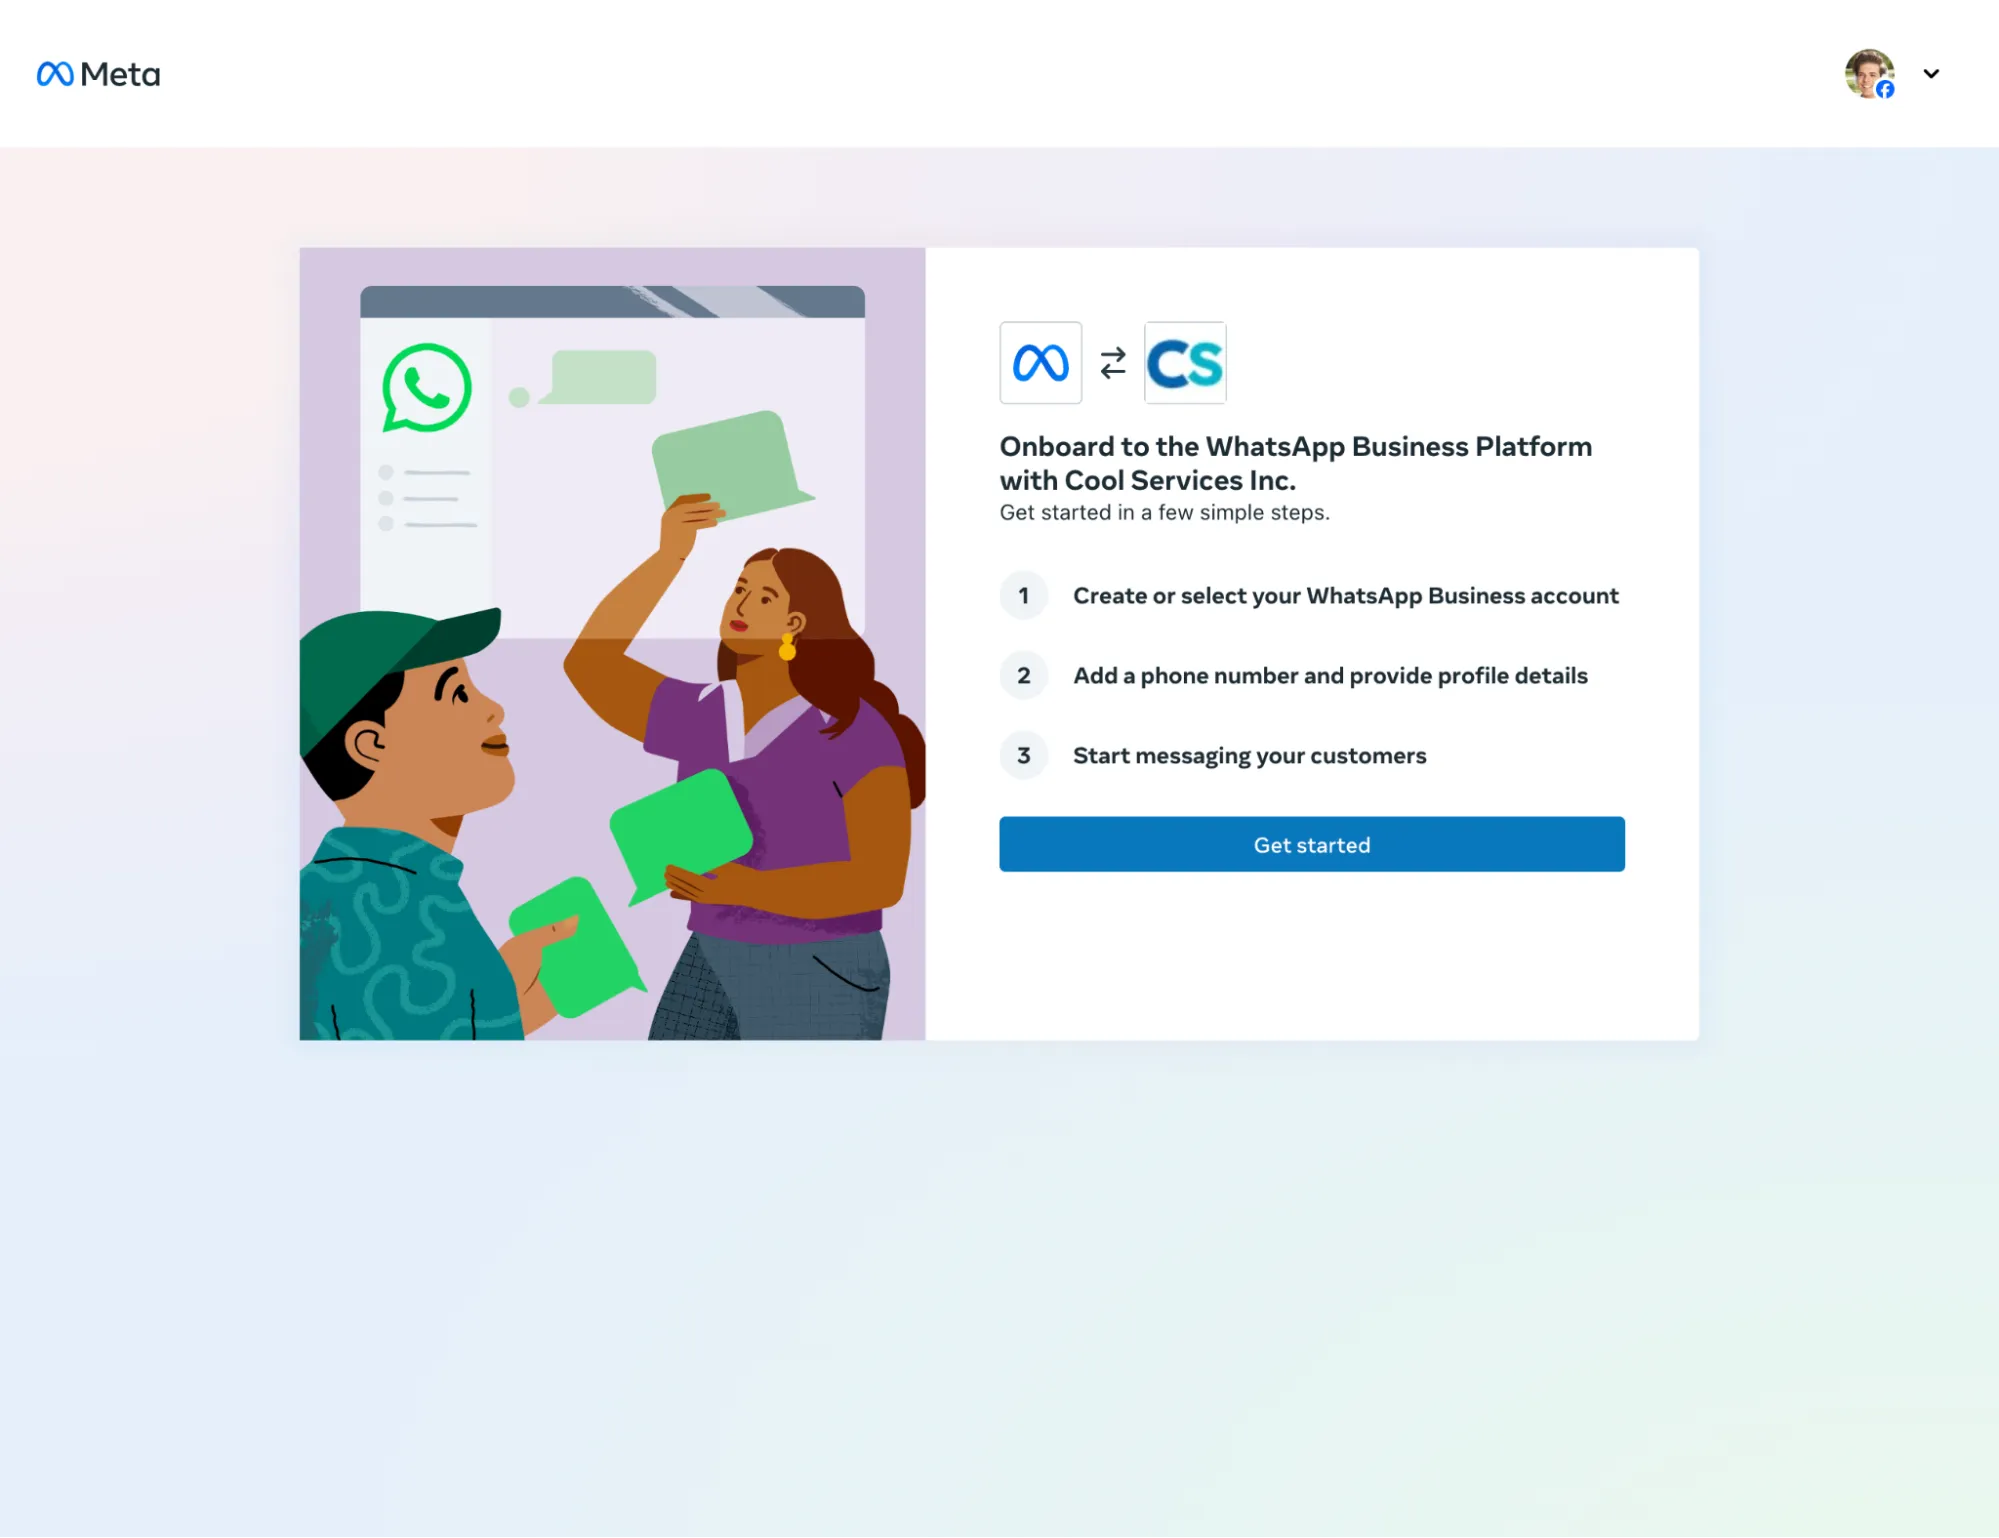
This onboarding page looks like this:

Click the Get started button. This is the flow that business customers who click the button on your website or customer portal will see. Complete the flow if you wish.
Step 3: Capture customer asset IDs
Step 4: Generate an HMAC-SHA256 hash
Generate an HMAC-SHA256 hash of your app secret and system token.
Bash example for Linux and macOS
echo -n "<SYSTEM_TOKEN>" | openssl dgst -sha256 -hmac "<APP_SECRET>"
<SYSTEM_TOKEN> — Your system token.<APP_SECRET> — Your app secret (App Dashboard > App settings > Basic)
Step 5: Get a business token
Step 7: Onboard the customer
Onboard the business customer by completing the steps in the appropriate onboarding guide below:
Onboarding business customers as a Tech Provider or Tech Partner (skip step 1)Onboarding business customers as a Solution Partner (skip step 1)
No comments to display
No comments to display