Automatic Events API | Developer Documentation
Automatic Events API
Updated: Nov 18, 2025
Business customers who access Embedded Signup can opt in to automatic event identification:

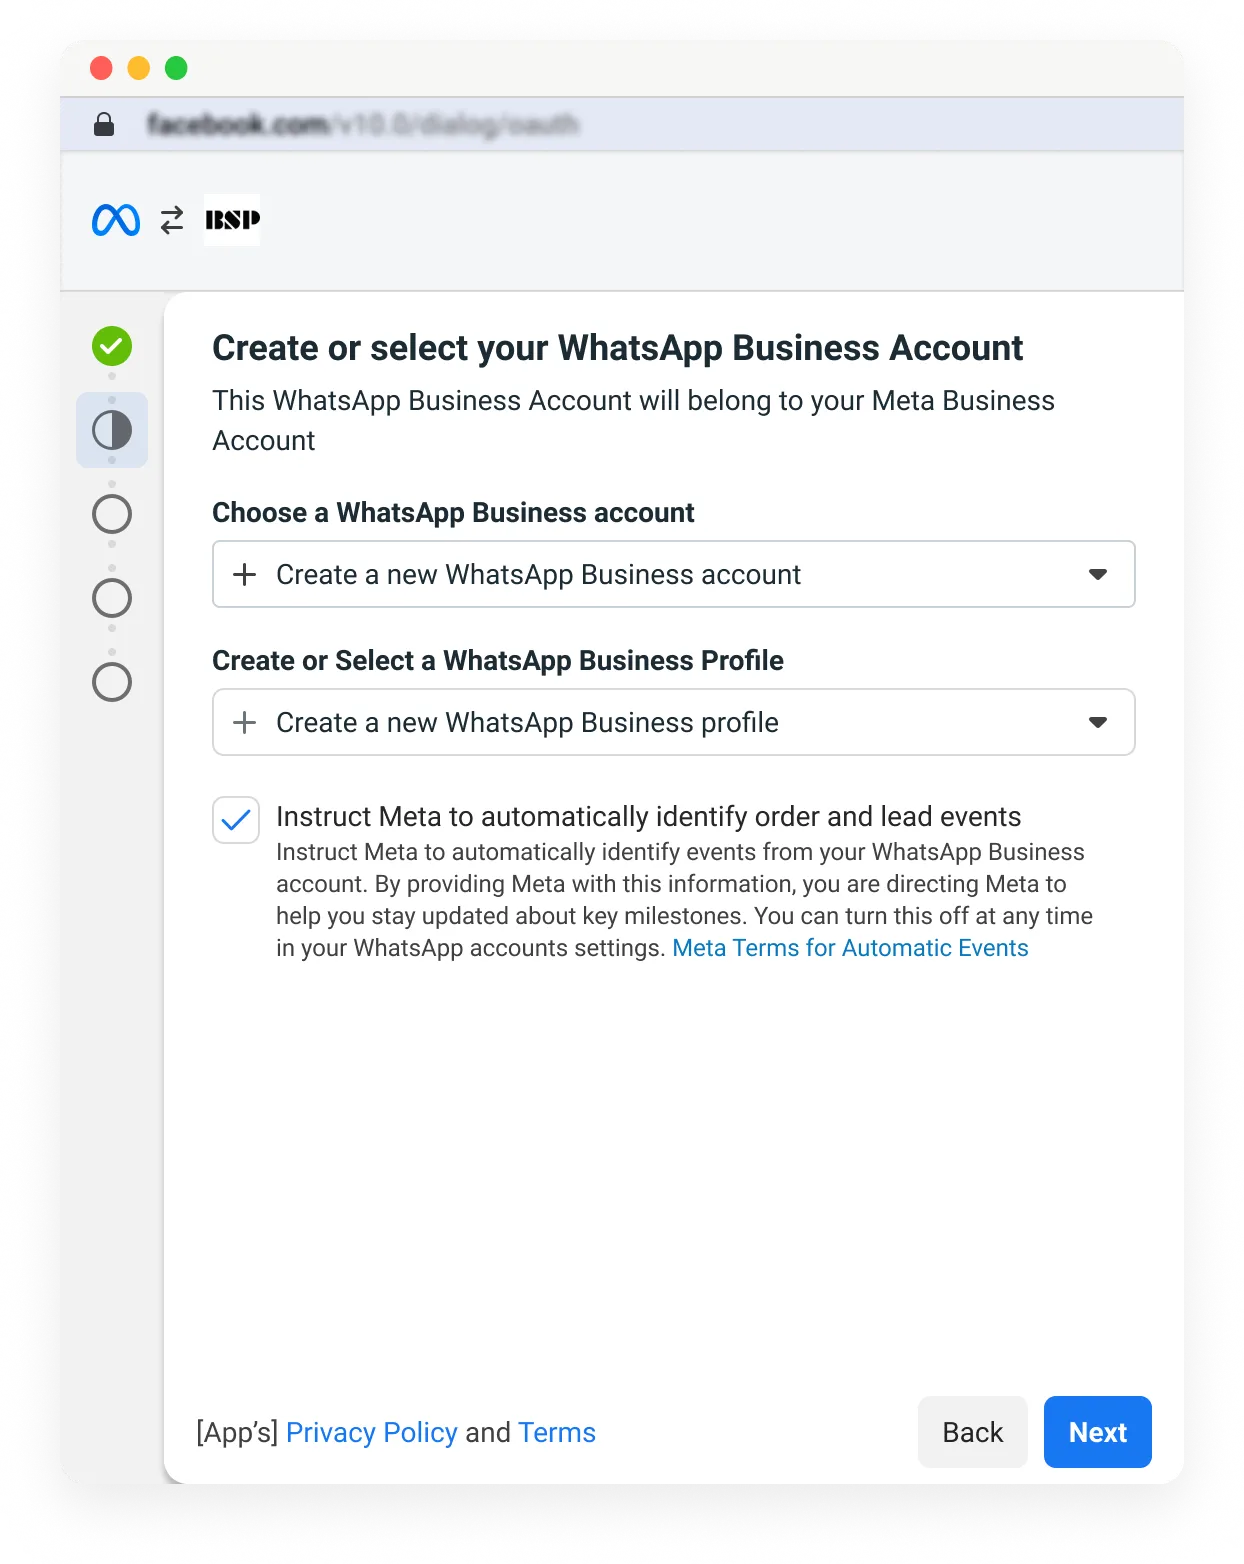
If a business customer opts in, Meta use a combination of regex and natural language processing to analyze the customer’s new message threads originating from Click-to-WhatsApp ads. If our analysis determines that a lead gen or purchase event occurred, an automatic_events webhook is triggered, describing the event. You can then report the event for the customer using the Conversions API so the customer can use it on a Meta surface (in 2026, see Limitations below).
To learn more about how this feature works, see these additional resources.
Limitations
Requirements
Setup
Automatic event identification is available as an opt-in feature to all business customers automatically. To receive event notifications, you must subscribe your app to the automatic_events webhook field. However, as soon as you do this, you may begin receiving these webhooks before you can process them. Therefore, complete these steps using a test app before moving your code to production and subscribing your production app to the webhook field.
Step 1: Subscribe to the automatic_events webhook field
Navigate to the App Dashboard > Webhooks > Configuration panel and subscribe to the automatic_events webhook field.
Step 2: Adjust your webhook callback
Adjust your webhook callback code so that it can successfully process automatic_events webhook payloads.
Lead gen event structure
{
"object": "whatsapp_business_account",
"entry": [
{
"id": "<WHATSAPP_BUSINESS_ACCOUNT_ID>",
"changes": [
{
"value": {
"messaging_product": "whatsapp",
"metadata": {
"display_phone_number": "<BUSINESS_DISPLAY_PHONE_NUMBER>",
"phone_number_id": "<BUSINESS_PHONE_NUMBER_ID>"
},
"automatic_events": [
{
"id": "<WHATSAPP_MESSAGE_ID>",
"event_name": "LeadSubmitted",
"timestamp": <WEBHOOK_TRIGGER_TIMESTAMP>,
"ctwa_clid": "<CLICK_ID>"
}
]
},
"field": "automatic_events"
}
]
}
]
}
Lead gen event example
{
"object": "whatsapp_business_account",
"entry": [
{
"id": "102290129340398",
"changes": [
{
"value": {
"messaging_product": "whatsapp",
"metadata": {
"display_phone_number": "15550783881",
"phone_number_id": "106540352242922"
},
"automatic_events": [
{
"id": "wamid.HBgLMTIwNjY3NzQ3OTgVAgASGBQzQUY3MDVCQzFBODE5ODU4MUZEOQA=",
"event_name": "LeadSubmitted",
"timestamp": 1749069089,
"ctwa_clid": "Afc3nYt4TTydumlFFsatFz8bR2yHCtVA92Veu_zDE4DgAI-QqCwM6eC3-K3lTGHRiLxRTVXFEsdyKQQSa-2obZyuGBq_EYypt_OwbMihBV0pbUoRmrGnEjwFTHop-Px0TfA"
}
]
},
"field": "automatic_events"
}
]
}
]
}
Purchase event structure
{
"object": "whatsapp_business_account",
"entry": [
{
"id": "<WHATSAPP_BUSINESS_ACCOUNT_ID>",
"changes": [
{
"value": {
"messaging_product": "whatsapp",
"metadata": {
"display_phone_number": "<BUSINESS_DISPLAY_PHONE_NUMBER>",
"phone_number_id": "<BUSINESS_PHONE_NUMBER_ID>"
},
"automatic_events": [
{
"id": "<WHATSAPP_MESSAGE_ID>",
"event_name": "Purchase",
"timestamp": <WEBHOOK_TRIGGER_TIMESTAMP>,
"ctwa_clid": "<CLICK_ID>",
"custom_data": {
"currency": "<CURRENCY_CODE>",
"value": <AMOUNT>
}
}
]
},
"field": "automatic_events"
}
]
}
]
}
Purchase event example
{
"object": "whatsapp_business_account",
"entry": [
{
"id": "102290129340398",
"changes": [
{
"value": {
"messaging_product": "whatsapp",
"metadata": {
"display_phone_number": "15550783881",
"phone_number_id": "106540352242922"
},
"automatic_events": [
{
"id": "wamid.HBgLMTIwNjY3NzQ3OTgVAgARGBIwRkU4NDI5Nzk3RjZDMzE2RUMA",
"event_name": "Purchase",
"timestamp": 1749069131,
"ctwa_clid": "Afc3nYt4TTydumlFFsatFz8bR2yHCtVA92Veu_zDE4DgAI-QqCwM6eC3-K3lTGHRiLxRTVXFEsdyKQQSa-2obZyuGBq_EYypt_OwbMihBV0pbUoRmrGnEjwFTHop-Px0TfA",
"custom_data": {
"currency": "USD",
"value": 25000
}
}
]
},
"field": "automatic_events"
}
]
}
]
}
Step 3: Trigger webhooks
To trigger an automatic_events webhook:
After you have triggered both automatic_events webhook payloads, confirm that your webhook callback has processed each webhook according to your business needs.
Step 4: Report each event using Conversions API (optional)
You can optionally report each event using the Conversions API. Include any relevant values from the event webhook, as appropriate.
See Send events via Conversions API for additional information about reporting events.
Lead gen syntax
curl 'https://graph.facebook.com/<API_VERSION>/<DATASET_ID>/events' \
-H 'Content-Type: application/json' \
-H 'Authorization: Bearer <ACCESS_TOKEN>' \
-d '
{
"data": [
{
"event_name": "LeadSubmitted",
"event_time": <WEBHOOK_TRIGGER_TIMESTAMP>,
"action_source": "business_messaging",
"messaging_channel": "whatsapp",
"user_data": {
"ctwa_clid": "<CLICK_ID>"
},
"messaging_outcome_data": {
"outcome_type": "automatic_events"
}
}
]
}
'
Purchase event syntax
curl 'https://graph.facebook.com/<API_VERSION>/<DATASET_ID>/events' \
-H 'Content-Type: application/json' \
-H 'Authorization: Bearer <ACCESS_TOKEN>' \
-d '
{
"data": [
{
"event_name": "Purchase",
"event_time": <WEBHOOK_TRIGGER_TIMESTAMP>,
"action_source": "business_messaging",
"messaging_channel": "whatsapp",
"user_data": {
"ctwa_clid": "<CLICK_ID>"
},
"custom_data": {
"currency": "<CURRENCY_CODE>",
"value": <AMOUNT>
},
"messaging_outcome_data": {
"outcome_type": "automatic_events"
}
}
]
}
'
Enabling and disabling via Meta Business Suite
Business customers who have already been onboarded via Embedded Signup can enable automatic event identification using Meta Business Suite.

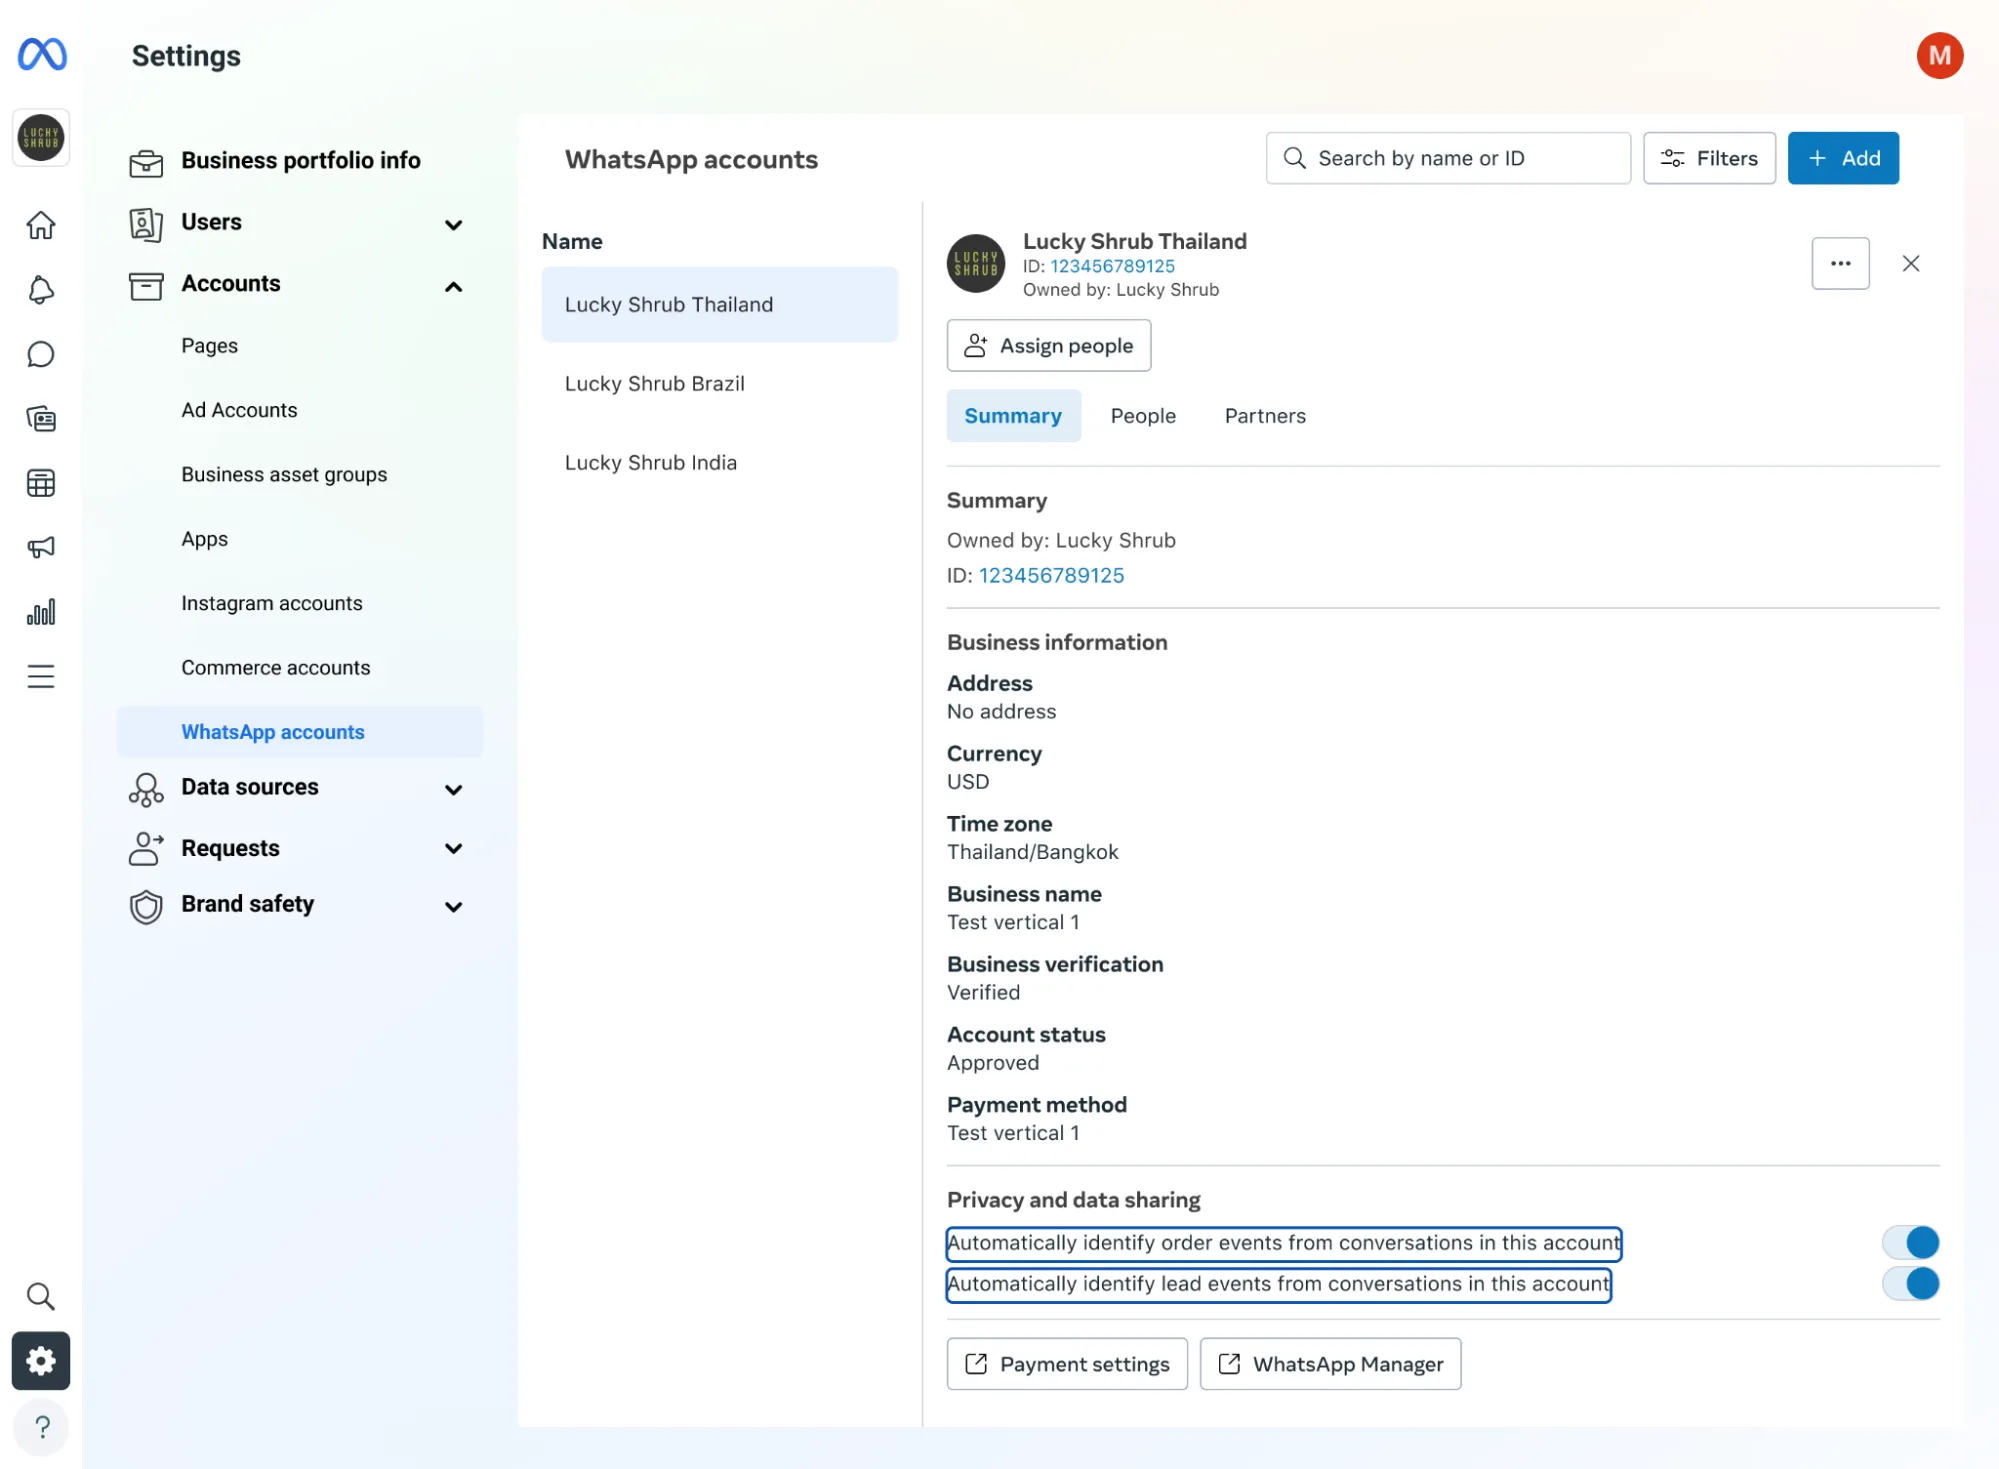
If a business customer who you have already onboarded wants to enable this feature, you can send them these instructions:
No comments to display