WhatsApp for Everbridge installation manual
Step-by-Step by step instructionsinstruction
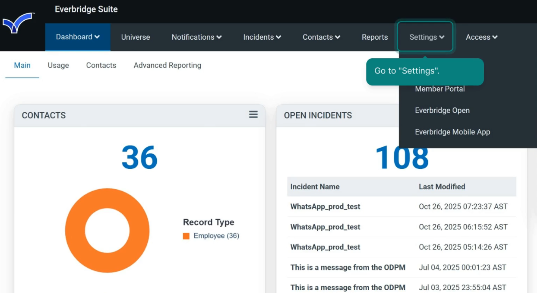
- Open Settings.
2. Select "“Everbridge Open"Open” section, then "“Response Subscriptions"Subscriptions”, and then "Webhooks"“Webhooks”.
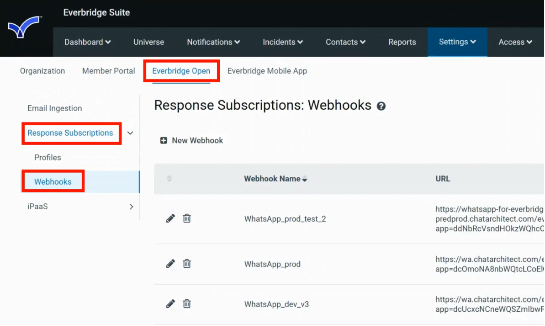
3. To create a new webhook, click "“New Webhook"Webhook”.
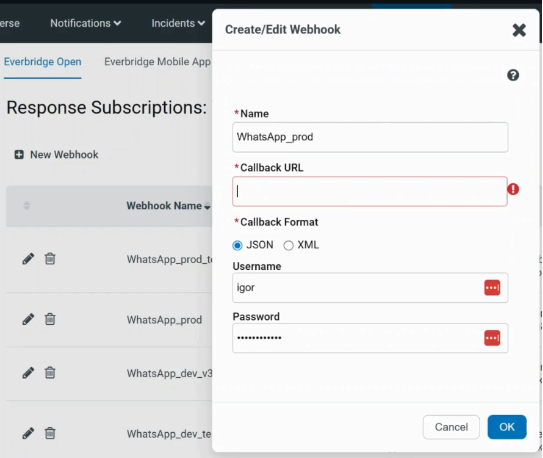
1) Fill in "Name"“Name”;
2) Fill in the“Callback "URL"URL”:
where:WhatsApp APP key {app} and WhatsApp Secret key {secret}: you need to get from our support.
Everbridge Access key {app}access_key_id} –& AppEverbridge IDSecret key {secret_key}: you need to get from yourEverbridge chatarchitect.com account{secret} – App SECRET from your chatarchitect.com account{action} – the action that the bot will perform: "send" - send a message, "close" - close a chat{secret_key} – the value of the API key that you will set in step 10admins.
3) in the "method" field, select "POST";
4)Choose “Callback Format”, fill in the“Username” "contentand type"“Password”. field,Click select "application/json";
5) in the "body" field, paste the following: {"contact": "{{contact.externalId}}", "template": "{{message.name}}", "notification_id": "{{notification.id}}"}
6) click "Save".OK.
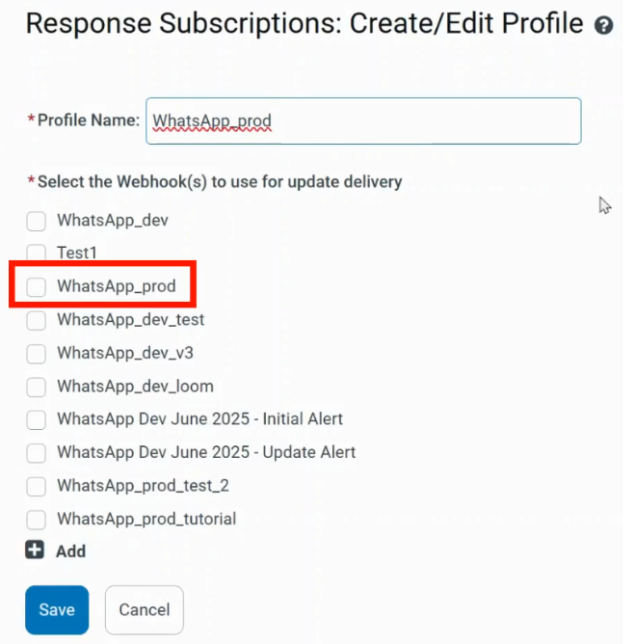
4. GoSelect to“Everbridge theOpen” "Contacts"section, sectionthen “Response Subscriptions”, then “Profiles”, and addclick clients“New who will receive messages.
The phone number in the "External Id" field must be in international format without the "+" sign (for example, 15554447788)Profile”.
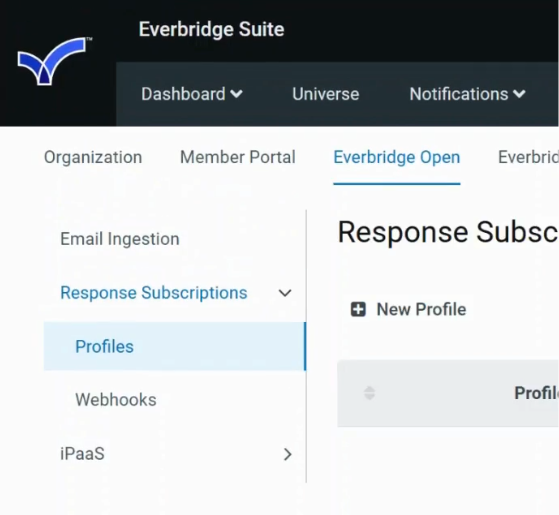
5. InFill in “Profile Name”. Select the "Contacts"necessary section,webhook. goClick to "Contact Attributes" and add an attribute "phone" of type "text"“Save”.
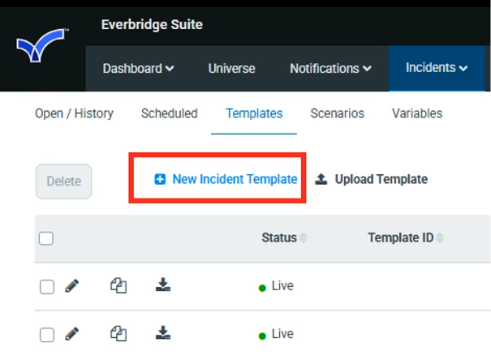
6. Go to the“Incidents”. "Notifications"Select section and create a new notification.“Templates”.

7. Click "Launch“New Notification"Incident to begin.Template”.
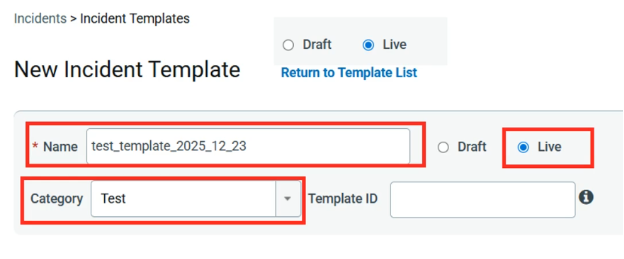
8. Fill in "Notification Name"“Name” and selectchoose "No“Category”.
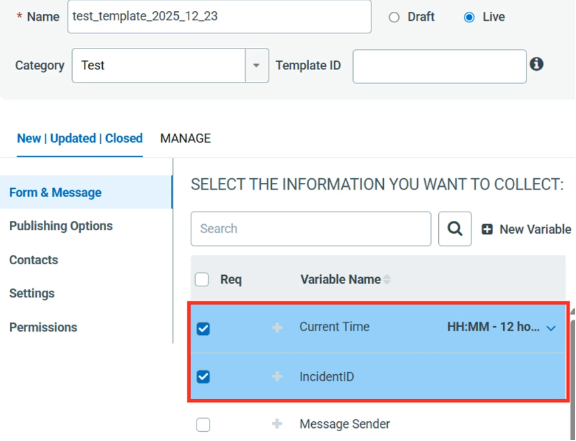
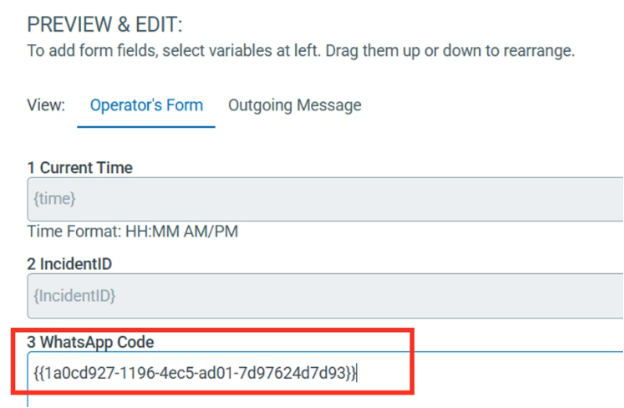
9. Select all the necessary variables. Their order can be rearranged in the "Incident"“PREVIEW field.& EDIT” section.
9. In the "Target Audience" field, add the contacts to which the message should be sent.
10. In the ChatArchitectChatarchitect app (https://wtargeted.com/settings), find the "APInecessary Keys" sectiontemplate and createcopy aits newID key. Copy(including the value of this key and paste it in the webhook URL as the value of the {secret_key} parameter.brackets).
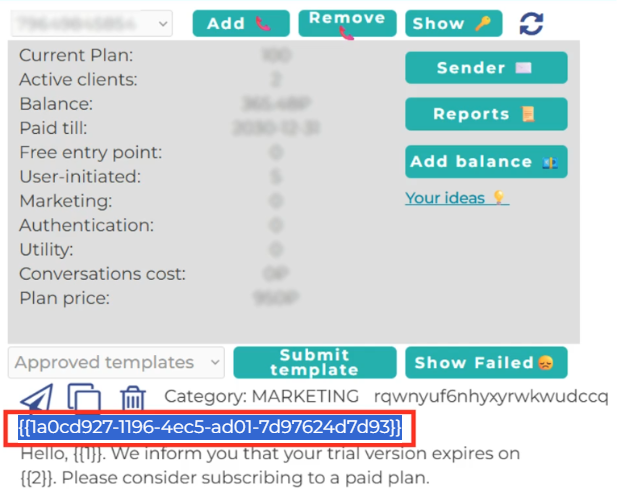
11. In the "Message" section of Everbridge, create a new message,in the name“PREVIEW of& whichEDIT” mustsection, matchpaste the namecopied template’s ID into the WhatsApp Code.
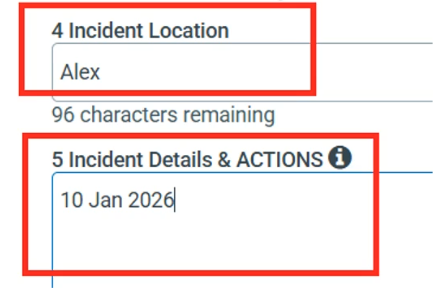
12. Fill in the input fields of the templatetemplate’s invariables thewith ChatArchitect app.values.
12. In the "Delivery Methods" section, set the webhook that you created in step 3.
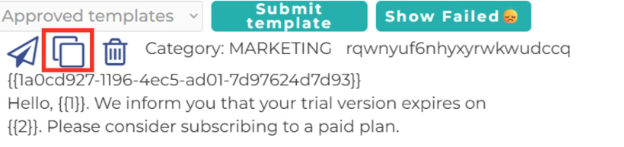
13. In the ChatArchitectChatarchitect app, copy the necessary template by clicking the buttonCopy button.
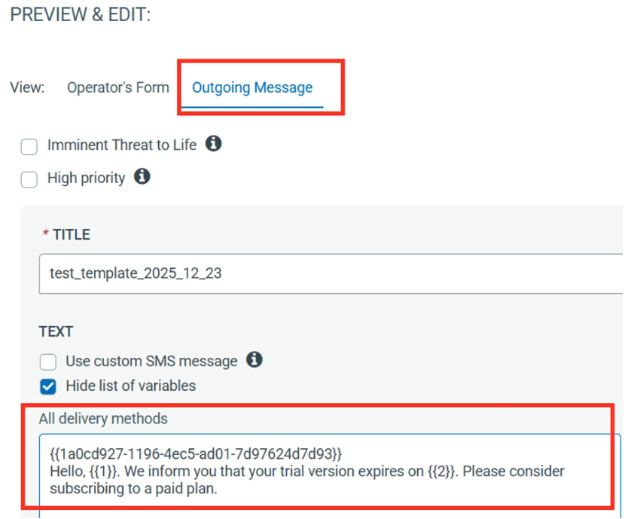
14. In Everbridge, select “Outgoing Message” and paste the copied template into “All delivery methods”.
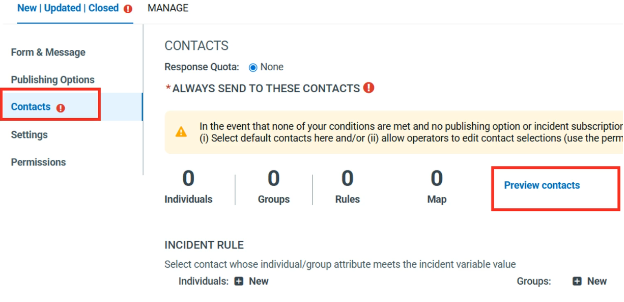
15. Select the “Contacts” section. Click “Preview contacts”.
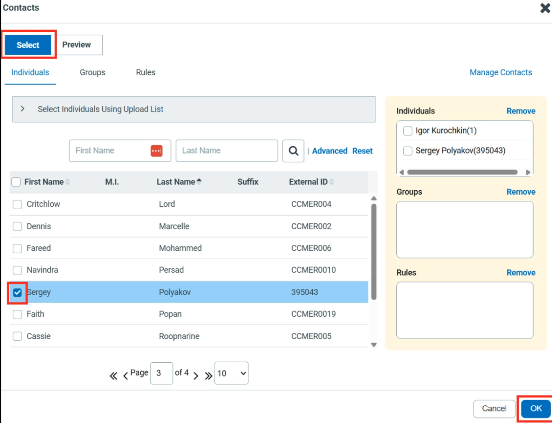
16. Click “Select” and choose contacts who will receive the message. Click OK.
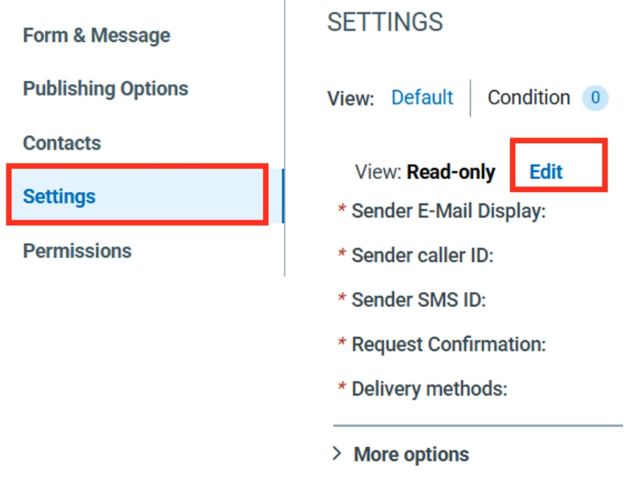
17. Go to “Settings” section. Click “Edit”.
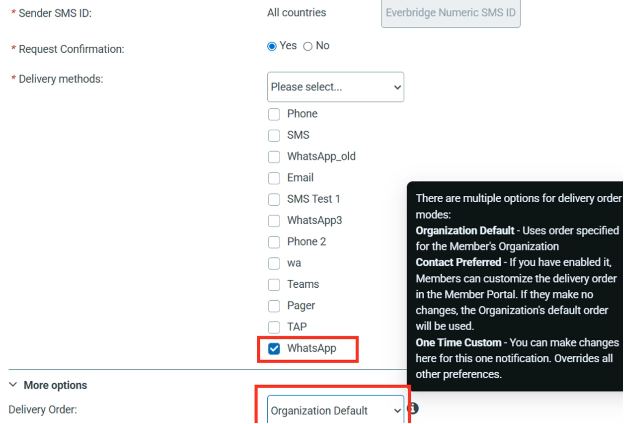
18. Select the necessary Delivery Order. In Delivery methods, select WhatsApp.
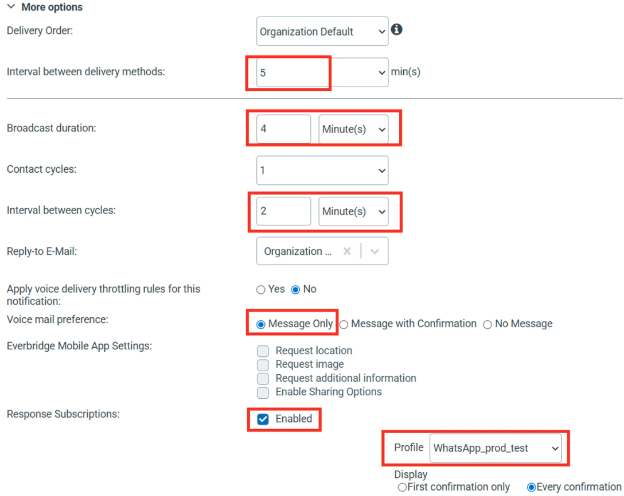
19. Select the necessary Profile and set all the necessary options.
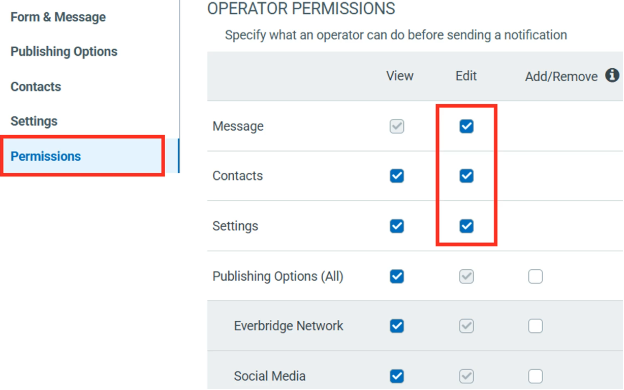
20. In the “Permissions” section, select all the necessary operator permissions.
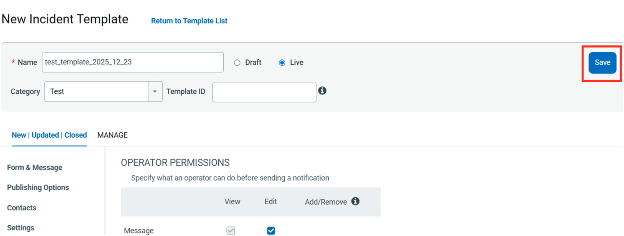
21. Click “Save” to save the template.
22. Select “Incidents” - “Launch Incident”.
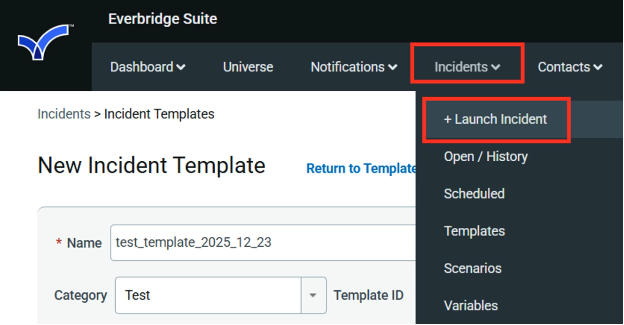
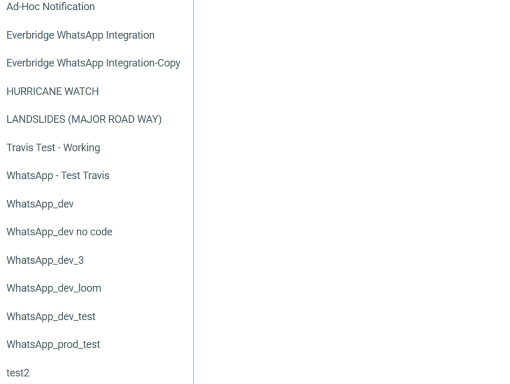
23. Select the necessary template from the list.
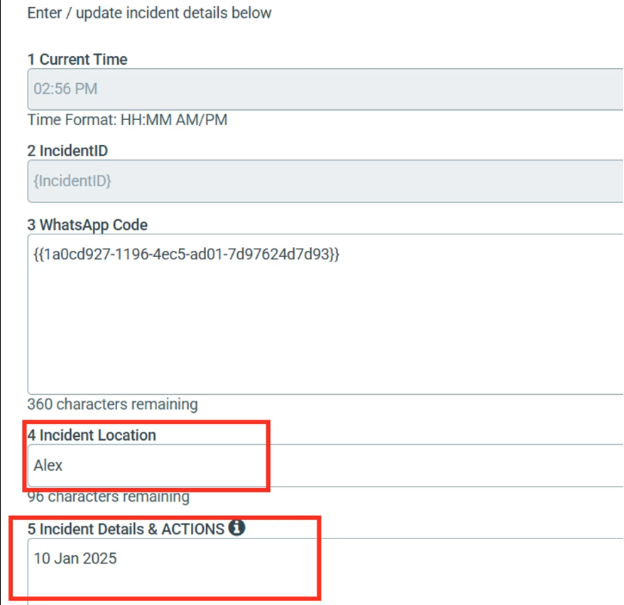
24. Set the values of the template’s variables.
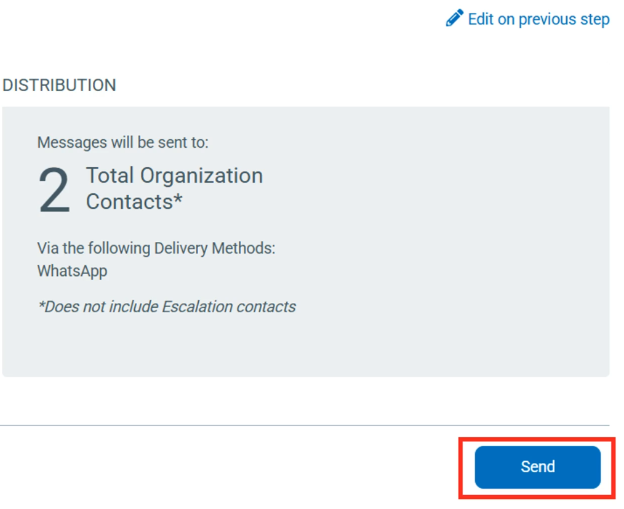
25. Specify the sending options and click “Review”.

26. To send the message, click “Send”.
27. The message will be sent to the rightcontacts ofyou had selected in the template16th name.step.

14. Launch the notification.