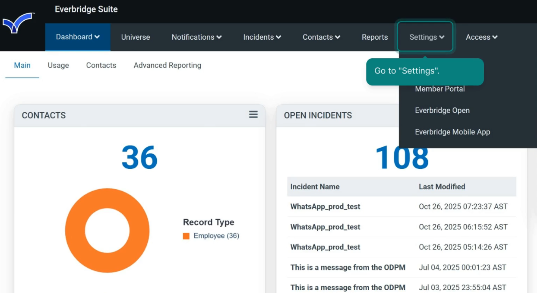
Step by step instruction
- Open Settings.
2. Select “Everbridge Open” section, then “Response Subscriptions”, and then “Webhooks”.
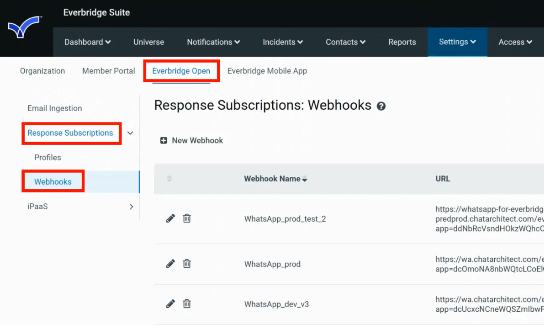
3. To create a new webhook, click “New Webhook”.
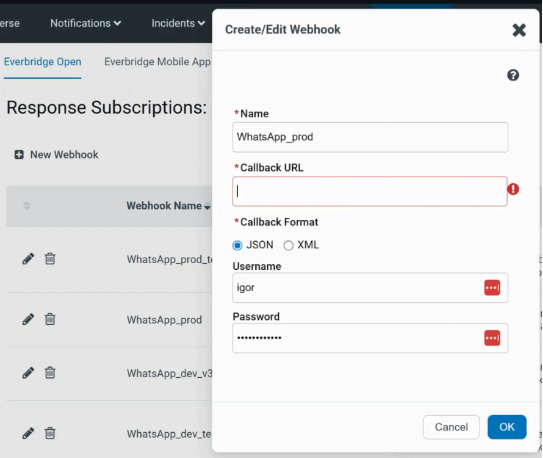
1) Fill in “Name”;
2) Fill in “Callback URL”:
WhatsApp APP key {app} and WhatsApp Secret key {secret}: you need to get from our support.
Everbridge Access key {access_key_id} & Everbridge Secret key {secret_key}: you need to get from Everbridge admins.
3)
Choose “Callback Format”, fill in “Username” and “Password”. Click OK.
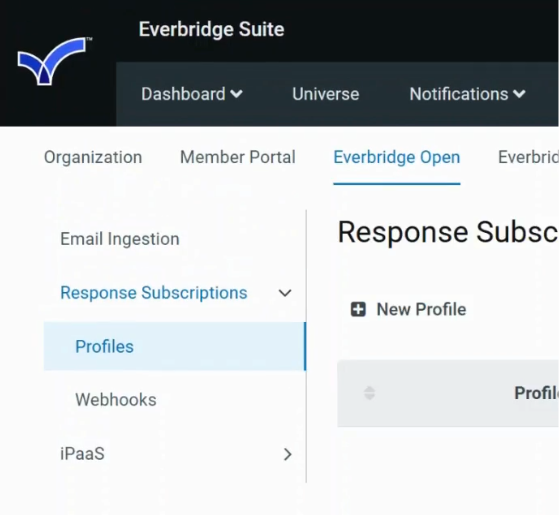
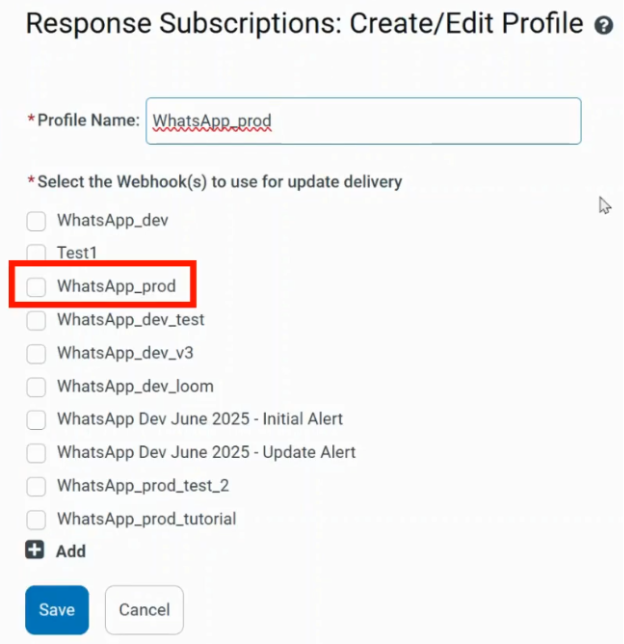
4. Select “Everbridge Open” section, then “Response Subscriptions”, then “Profiles”, and click “New Profile”.
5. Fill in “Profile Name”. Select the necessary webhook. Click “Save”.
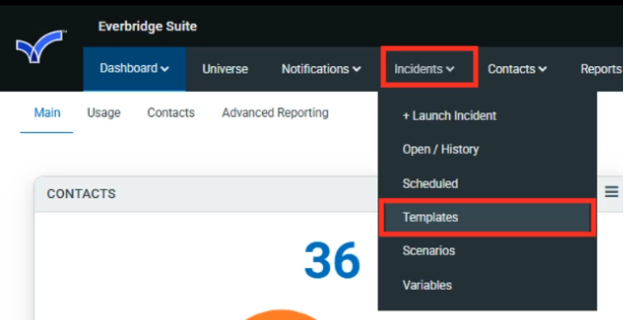
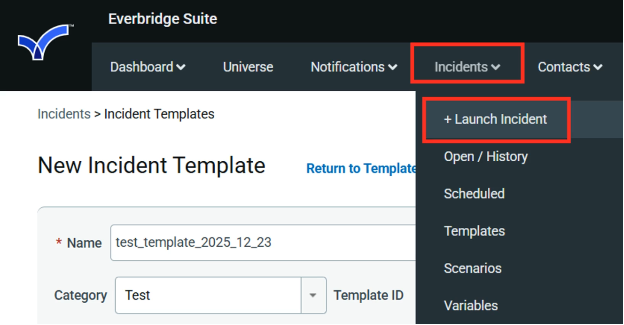
6. Go to “Incidents”. Select “Templates”.
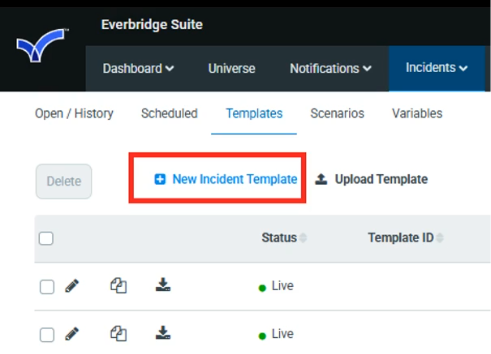
7. Click “New Incident Template”.
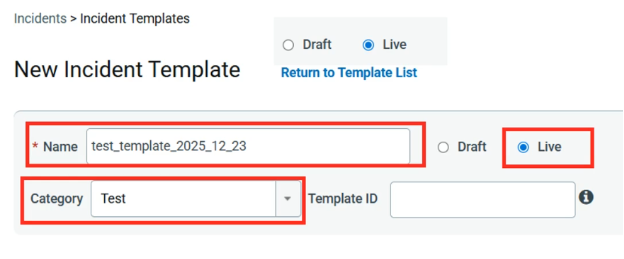
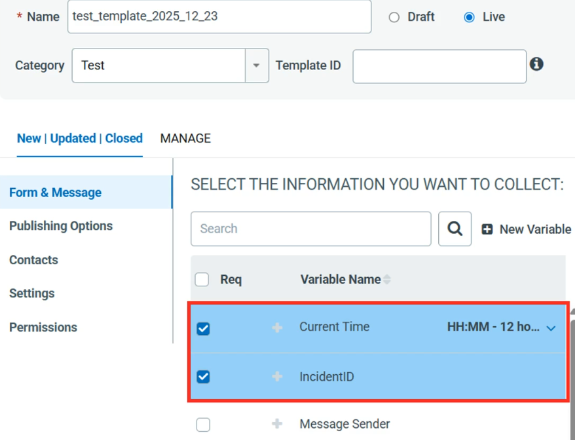
8. Fill in “Name” and choose “Category”.
9. Select all the necessary variables. Their order can be rearranged in the “PREVIEW & EDIT” section.
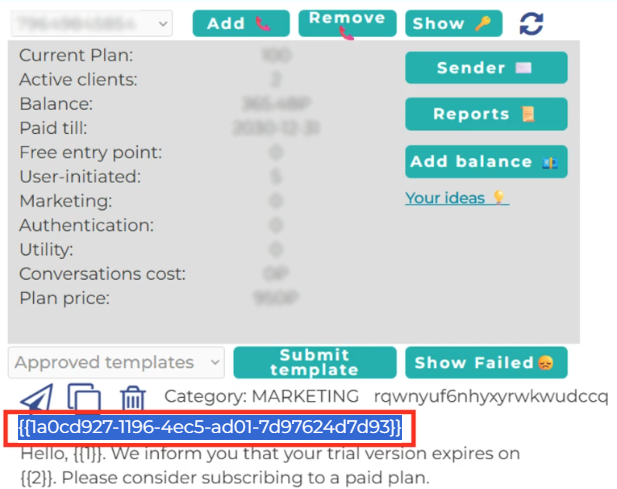
10. In the Chatarchitect app (https://wtargeted.com/settings), find the necessary template and copy its ID (including the brackets).
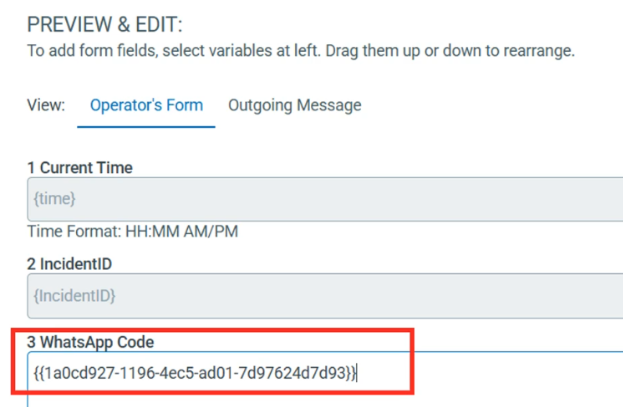
11. In Everbridge, in the “PREVIEW & EDIT” section, paste the copied template’s ID into the WhatsApp Code.
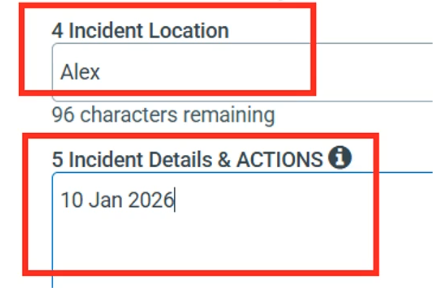
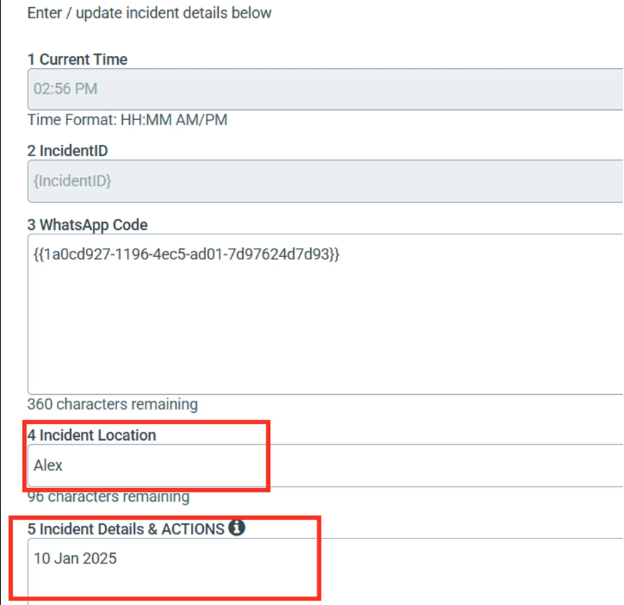
12. Fill in the input fields of the template’s variables with values.
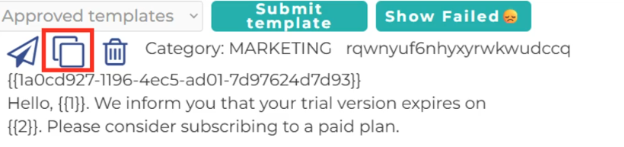
13. In the Chatarchitect app, copy the necessary template by clicking the Copy button.
14. In Everbridge, select “Outgoing Message” and paste the copied template into “All delivery methods”.

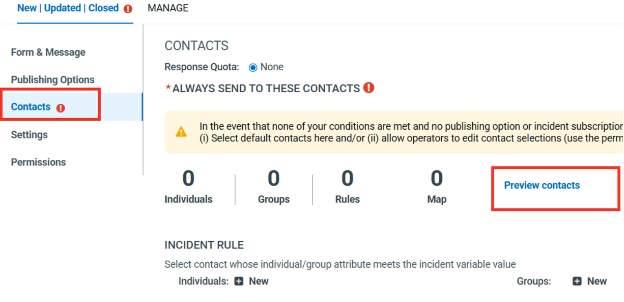
15. Select the “Contacts” section. Click “Preview contacts”.
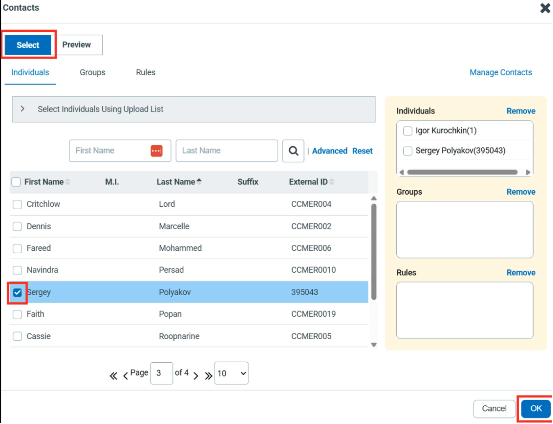
16. Click “Select” and choose contacts who will receive the message. Click OK.
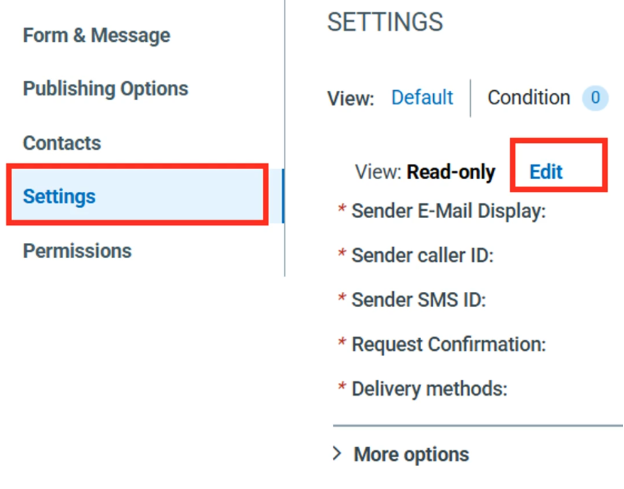
17. Go to “Settings” section. Click “Edit”.
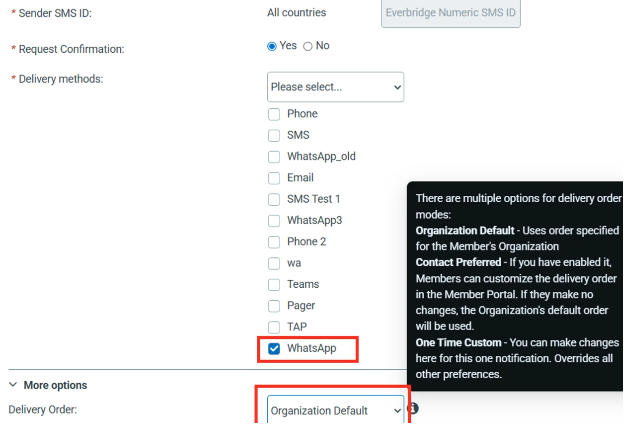
18. Select the necessary Delivery Order. In Delivery methods, select WhatsApp.
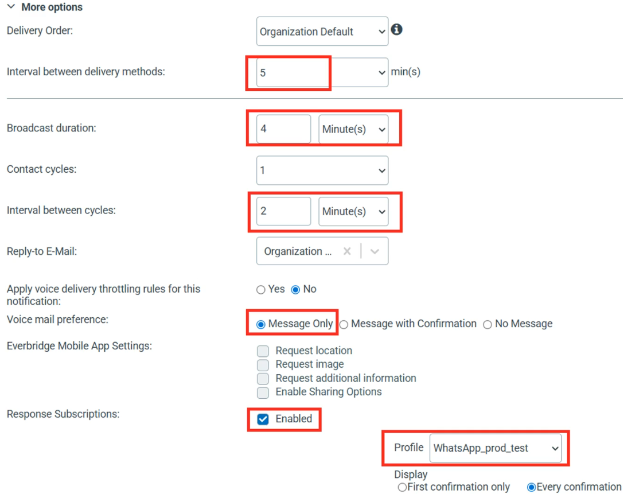
19. Select the necessary Profile and set all the necessary options.
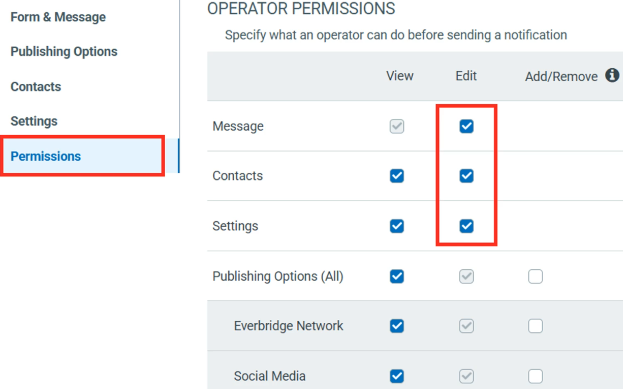
20. In the “Permissions” section, select all the necessary operator permissions.
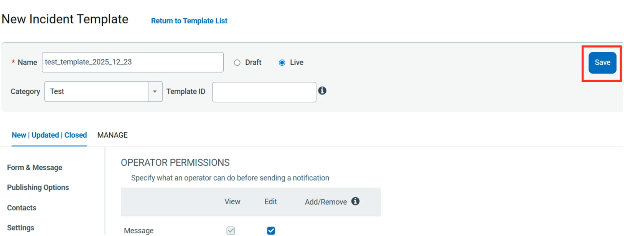
21. Click “Save” to save the template.
22. Select “Incidents” - “Launch Incident”.
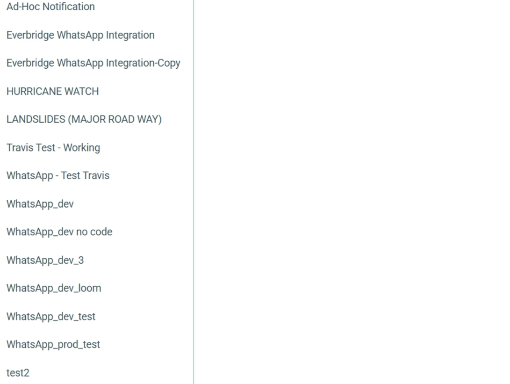
23. Select the necessary template from the list.
24. Set the values of the template’s variables.
25. Specify the sending options and click “Review”.
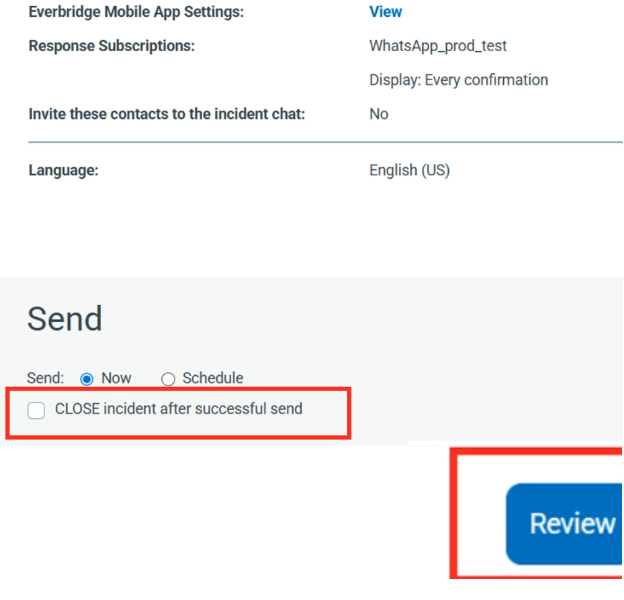
26. To send the message, click “Send”.
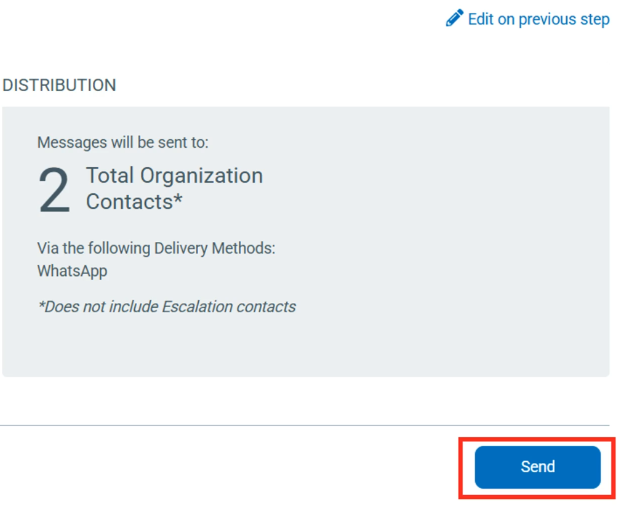
27. The message will be sent to the contacts you had selected in the 16th step.
