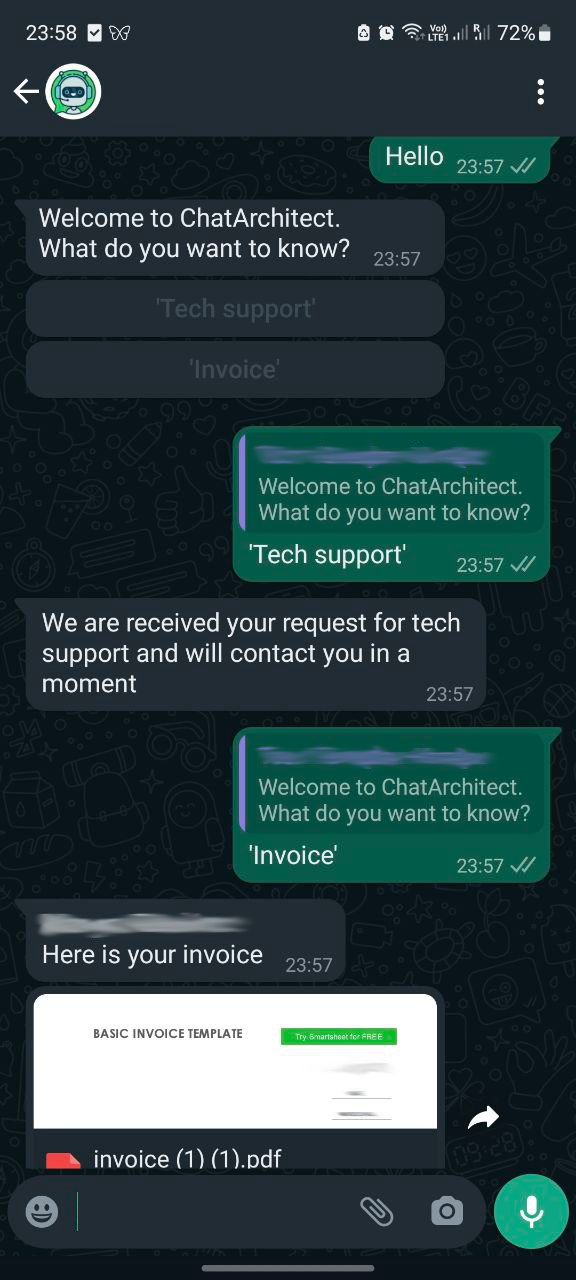
In this guide, we will implement the next scenario: On incoming client message, the trigger moves the lead to the "Ask client" stage -> CRM automatically sends a message template to the client (lead) with text and two buttons (Invoice and Support) -> If a client presses the “Invoice” button, he moves to the Bitrix24 “Invoice” stage and receives an invoice link -> In case if client presses “Support” button he moves to the Bitrix24 “Tech support” stage and receives contact information of tech support.
NOTE: This instruction assumes that you have already completed the “WhatsApp Business API for Bitrix24: Installation and sending the first message” guide [Bitrix24 (chatarchitect.com)]
Step by step instruction
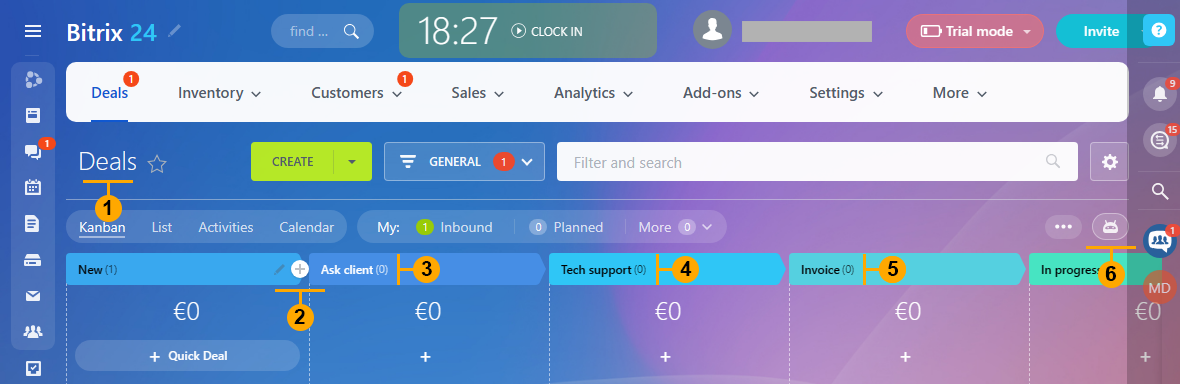
1. Go to “Deals” (1). Press the “+” button (2) on the first stage and create two new stages in “Ask client” (3) and “Tech support” (4). Then press the “Automations” button (6)
NOTE: “Invoice” stage (5) is a standard Bitrix24 stage, and we are assuming that you already have it.
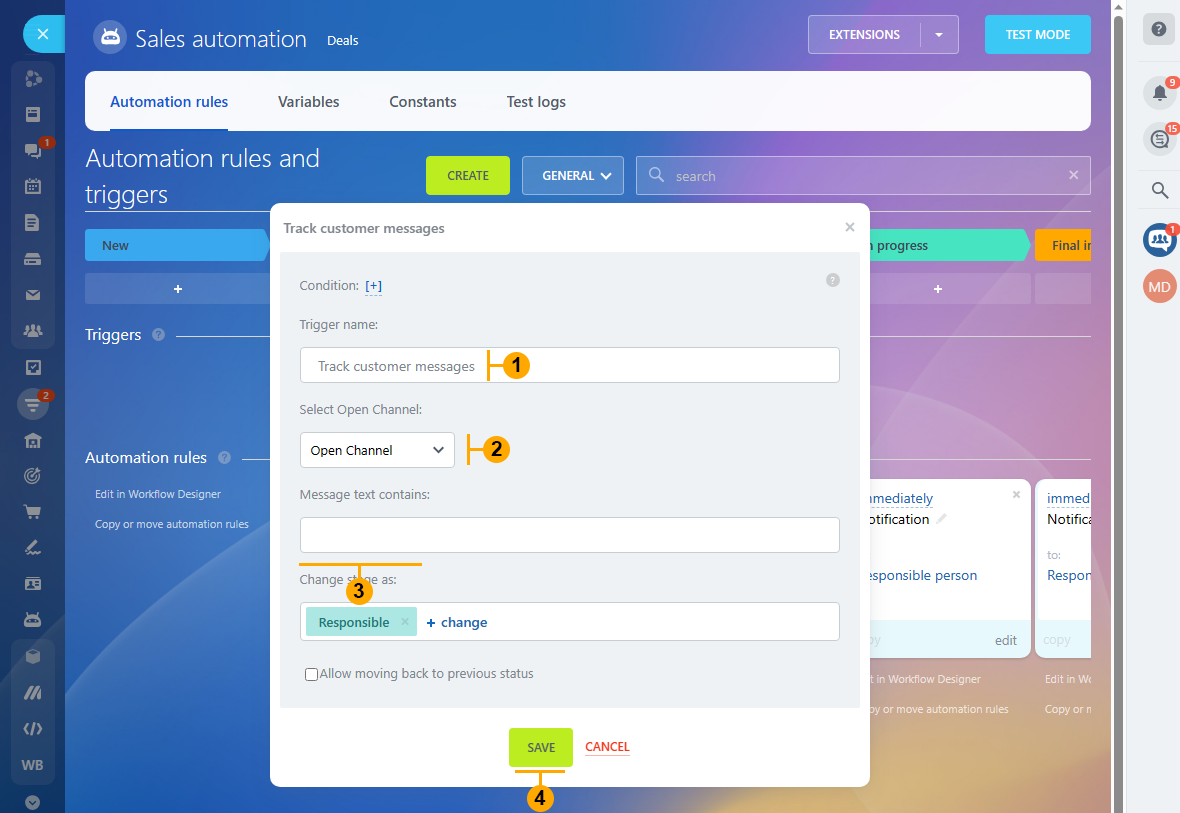
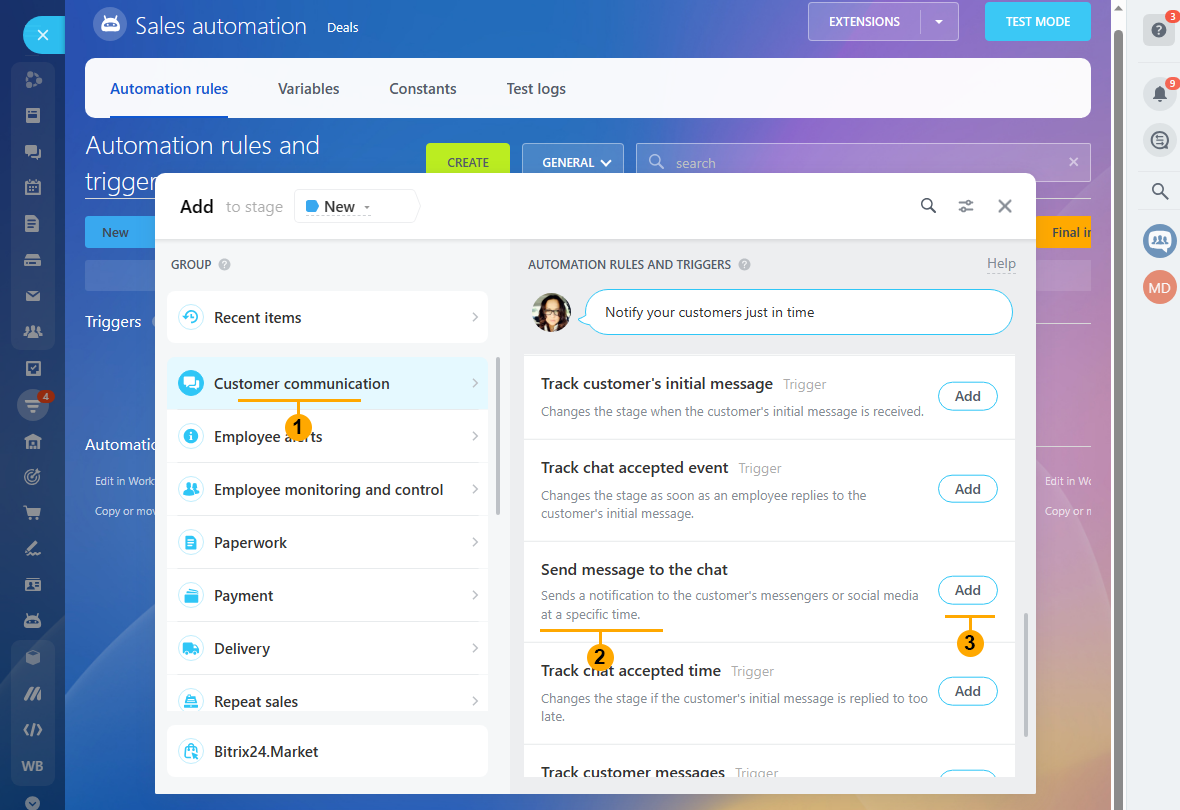
2. In the opened window (1) you need to create three triggers (2)(3)(4) that will listen to all incoming client messages and react to keywords in those messages.

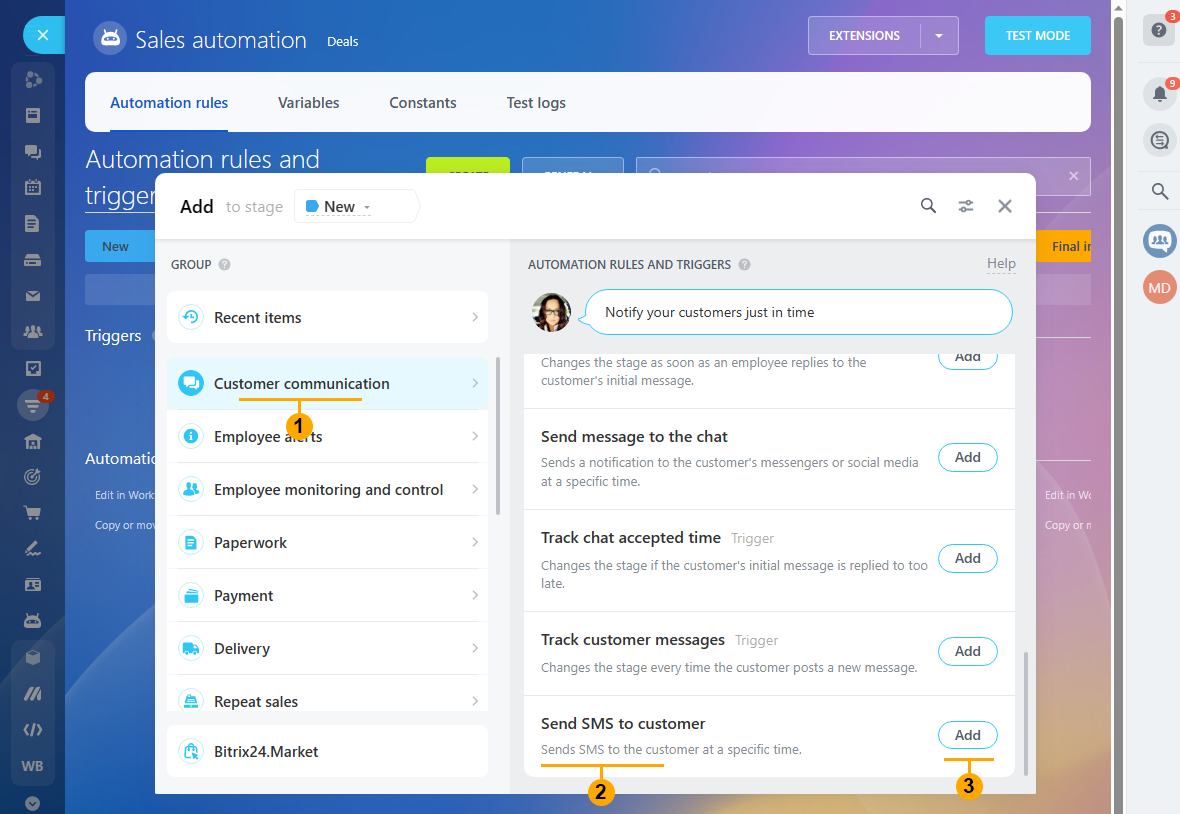
2.1 Press “+” button (2) from “Step 2” to add a new trigger to the “Ask client” stage and configure the trigger like in the picture below: select “Customer communication” (1) then find the “Track customer messages” trigger (2) and press “Add” button (3).

2.2 In the appeared window give a name to the trigger (1). Select which channel it will listen (2)*. “Message text contains” (3) leave empty**. Press the “Save” button (4)
NOTE: * By default, Bitrix24 gives the name to the Whatsapp channel - “Open channel”
** Empty “Message text contains” means that the trigger will react on any “Lead” message.
IMPORTANT! Don’t check “Allow moving back to previews status”
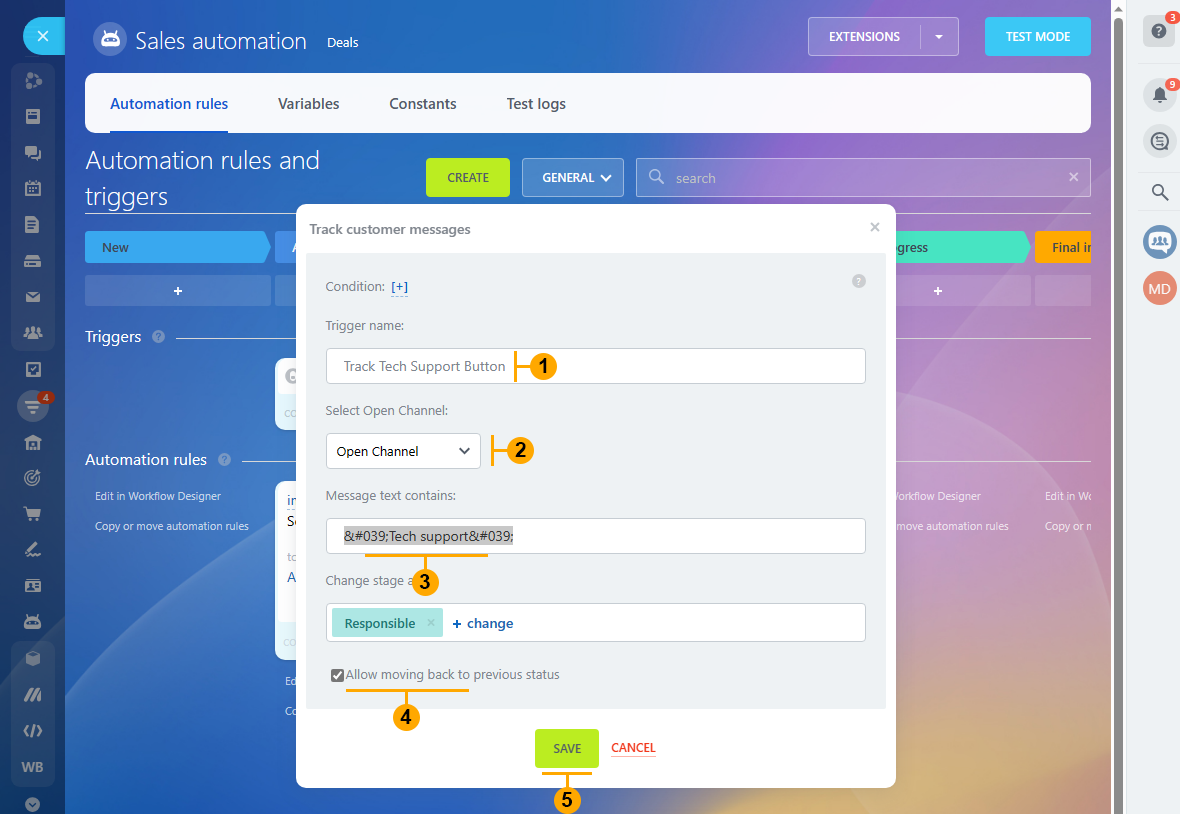
2.3 Press “+” button (3) from “Step 2” to add a new trigger to the “Tech support” stage and configure the trigger like in the picture below: select “Customer communication” (1) then find the “Track customer messages” trigger (2) and press “Add” button (3).
2.4 In the appeared window give a name to the trigger (1). Select which channel it will listen (2)*. 39; Message text contains 39; (3) write 'Tech support'. Check “Allow moving back to previews status” (4). Press the “Save” button (5)
2.5 Press “+” button (4) from “Step 2” to add a new trigger to the “Invoice” stage and configure the trigger like in the picture below: select “Customer communication” (1) then find the “Track customer messages” trigger (2) and press “Add” button (3).
2.6 In the appeared window give a name to the trigger (1). Select which channel it will listen (2)*. “Message text contains” (3) write 'Invoice'. Check “Allow moving back to previews status” (4). Press the “Save” button (5)

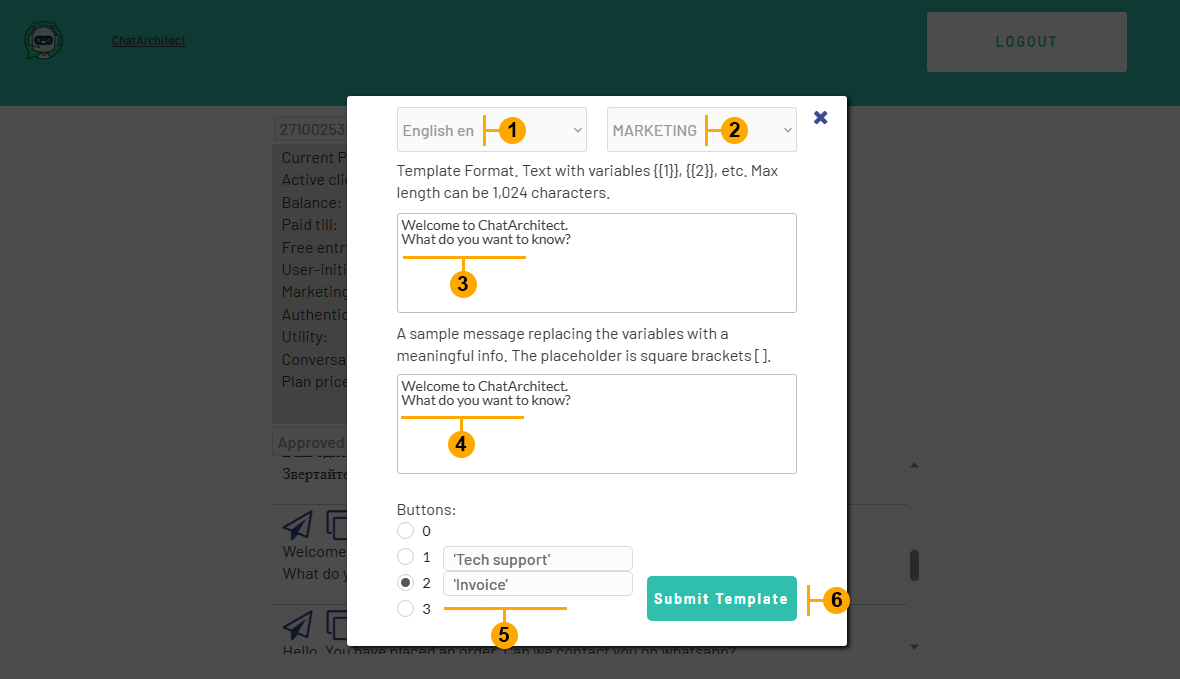
Now you need to create and approve the message template on the https://app.chatarchitect.com website. Make selections (1) and (2). Write template text (3). Repeat template text (4). Write ‘Tech support’ **** as the name of the first button. Write ‘Invoice’ **** as the name of the second button (5) and hit the “Submit template” button (6)
**** IMPORTANT! To avoid accidental triggers (if the user writes similar combinations of words that the trigger listens for), it is important to make template buttons with unique characters. We recommend apostrophes around the edges. For example ‘Tech support’.
Now let’s create three automations (2), (3), (4) in Bitrix24 like in the picture below:
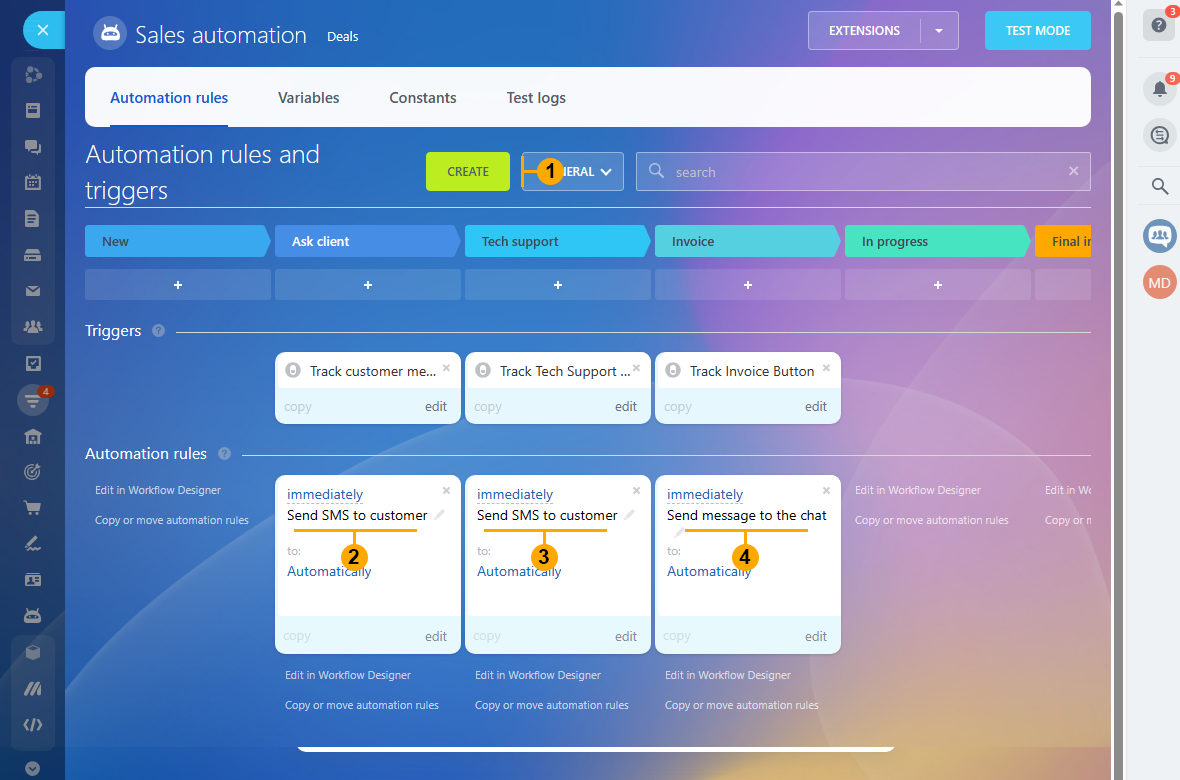
4.1 Hit “Create” button (1) from “Step 4” and create the first automation “Send SMS to customer” (2) for “Ask client” stage.
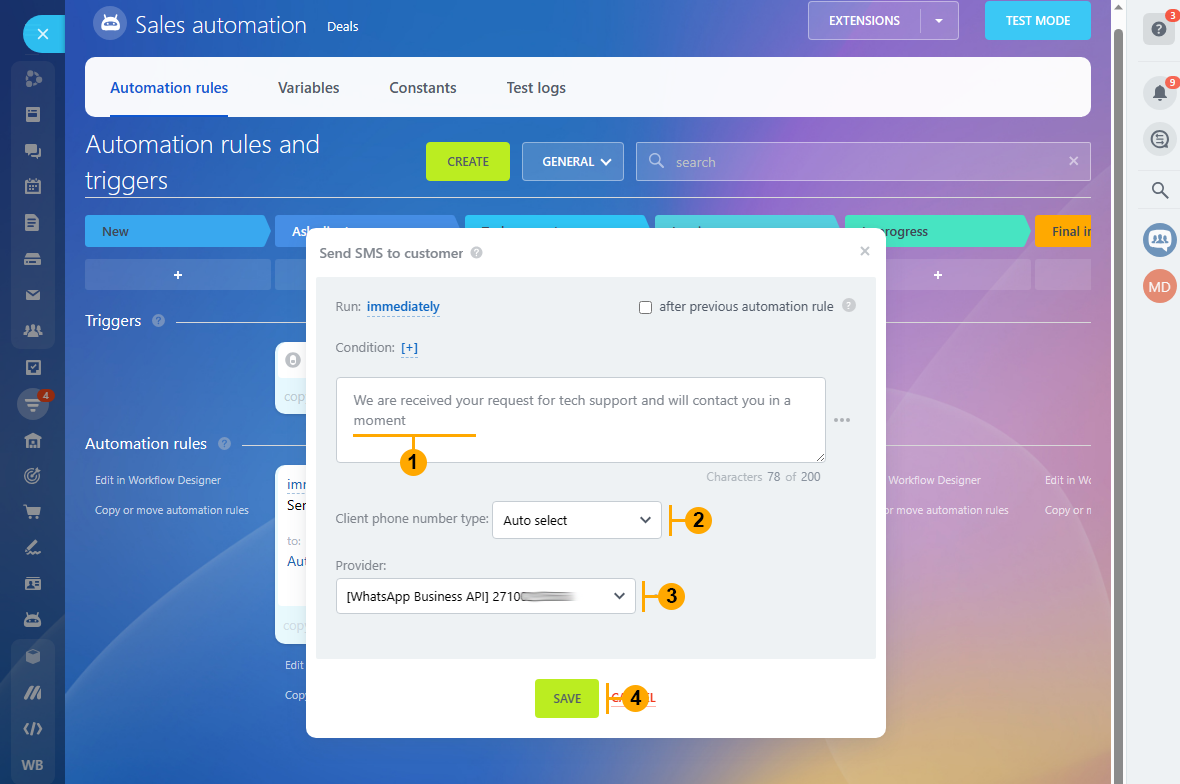
4.2 Our first automation will send our approved WhatsApp template from “Step 3”. Insert template text in the text field (1). Make selections (2) and (3) and hit the “Save” button (4)

4.3 Hit “Create” button (1) from “Step 4” and create the second automation “Send SMS to customer” (2) for “Tech support” stage. Write the “Support” text in the text field (1). Make selections (2) and (3) and hit the “Save” button (4)
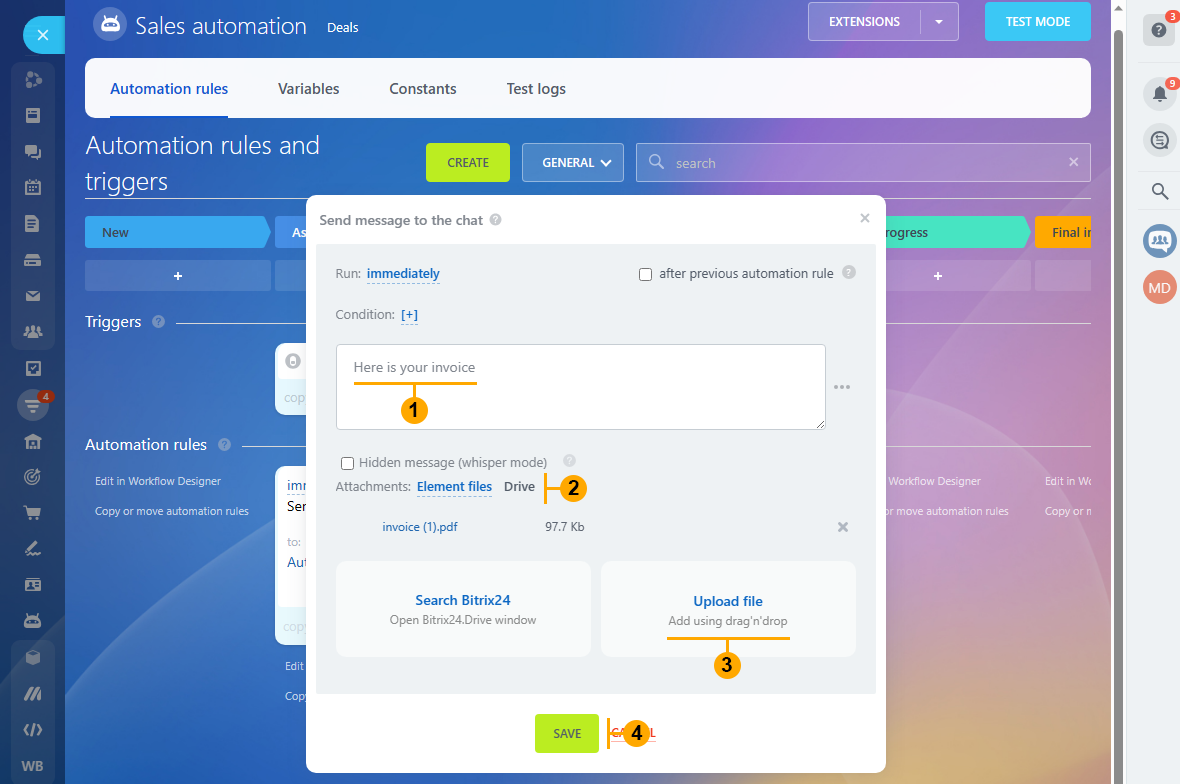
4.4 Hit “Create” button (1) from “Step 4” and create the third automation “Send message to the chat” (2) for the “Invoice” stage.
4.5 Write the “Invoice” text in the text field (1). Select (2) and then (3) to upload an invoice file from your drive. And hit the “Save” button (4)
5. Now let’s test our result. Send “Hello” to your WhatsApp number and enjoy your work!