As a result of following all points of this instruction:
- See live examples of creating bots in Kommo / AmoCRM.com
- Learn to make independent salesbots for several WhatsApp numbers on one account.
Step by step instruction
1. Adding a new number for the second site/department to your app.chatarchitect.com and kommo.com accounts
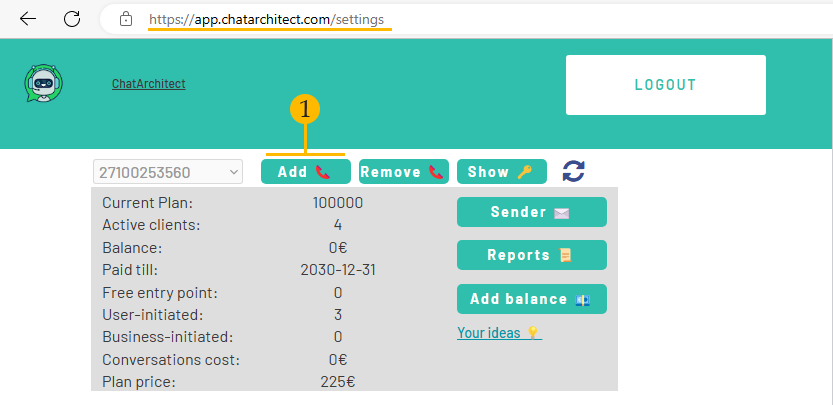
1.1 Add a second number to your app.chatarchitect.com account. To do this, press the button (1). Fill in App ID and APP SECRET
1.2 Add a second number to your kommo.com account. To do this, go to the Settings (2) -> Integrations (3) section and click on the ChatArchitect application icon (4)
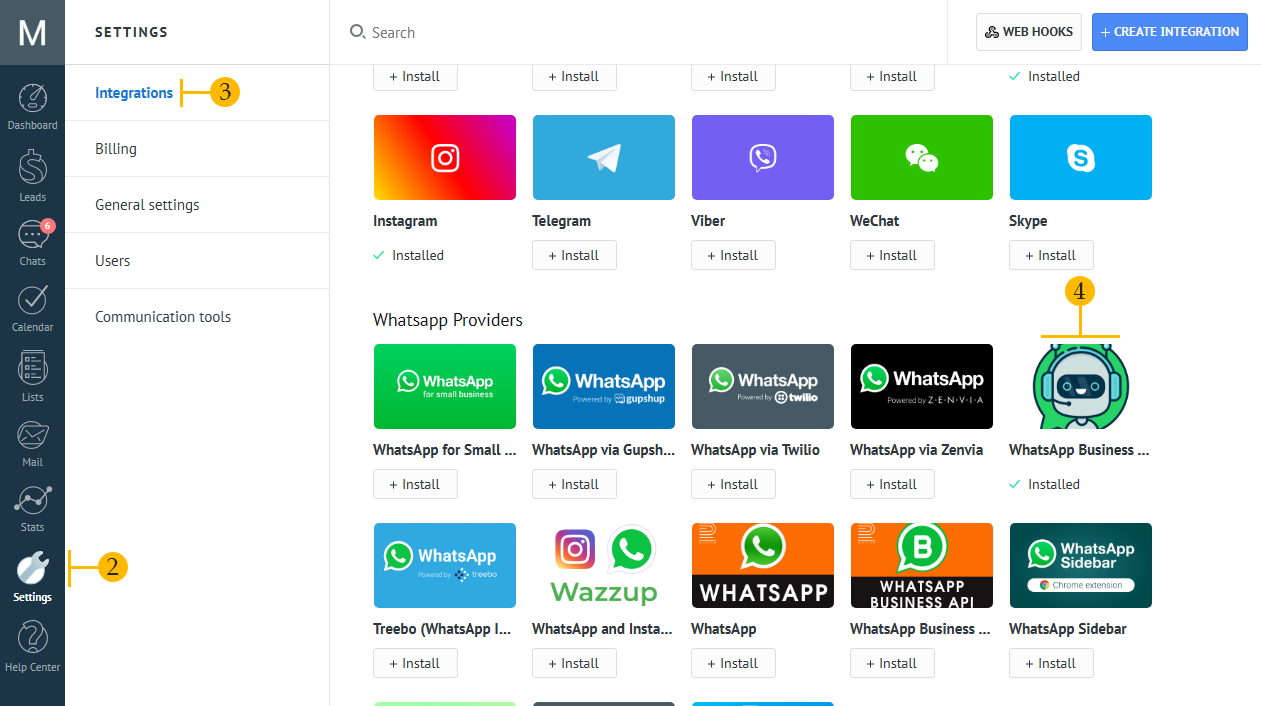
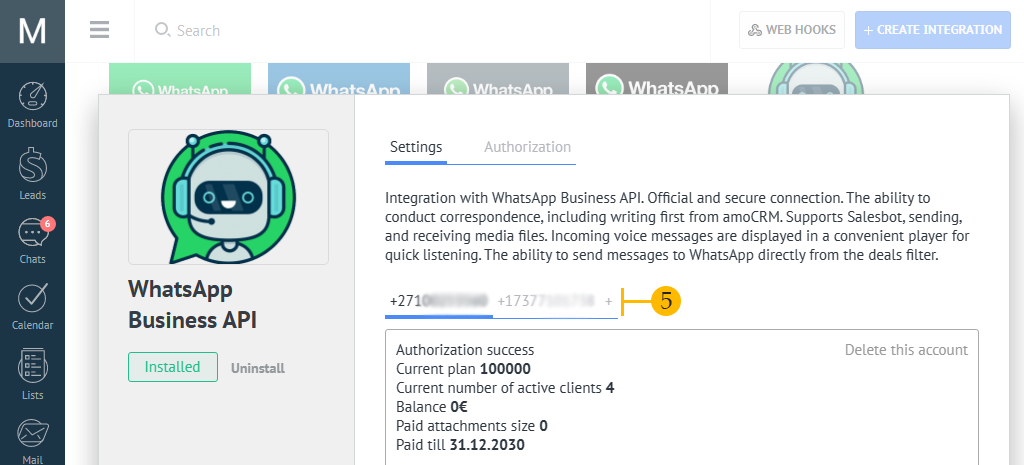
1.3 To add a new number, press the “+” button (5). In the window that appears, enter the API key and Secret Key of your second phone
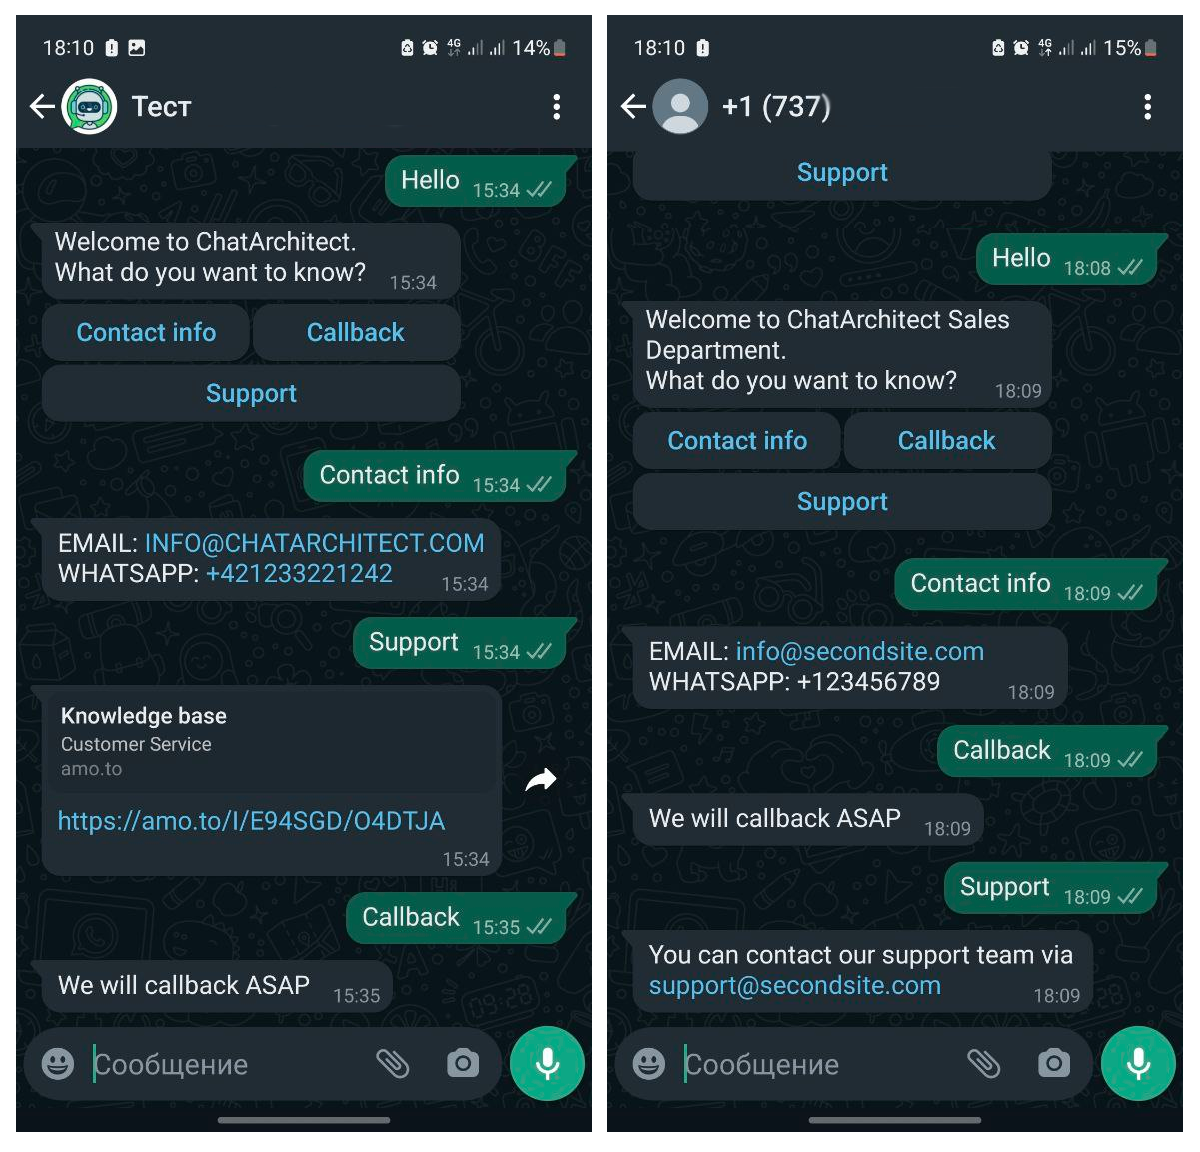
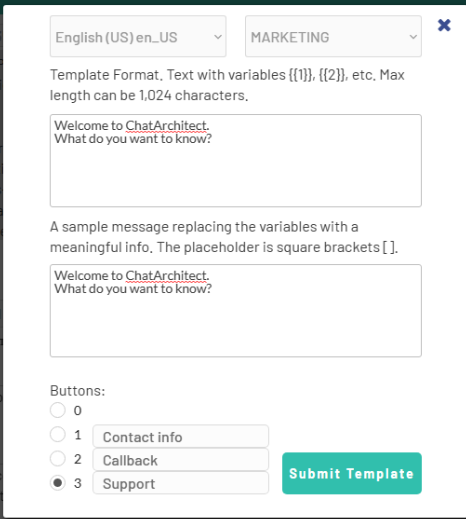
2. Approve templates message (which will be sent to all customers when interacting with WhatsApp chats of company sites/departments) on app.chatarchitect.com. In the screenshot, an example of the first template for the first number, the second template is added in the same way for the second number.
3. Set up a personal SalesBot for each number separately.
3.1 To configure SalesBot, go to Settings (1) -> Communication tools (2) -> Click on the word “Create” (3)

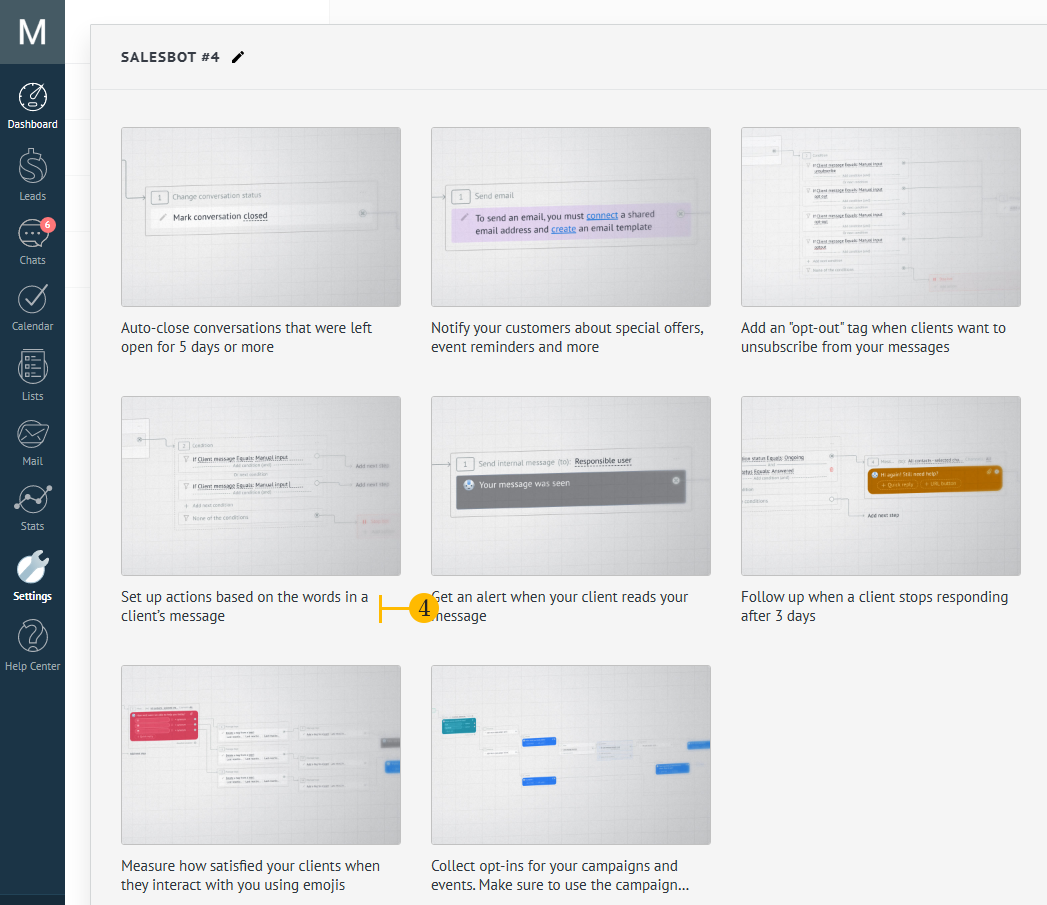
3.2 In the window that appears, you can select the template “Set up actions based on the words in a client's message” (which means that the bot will read the chat and respond to the keywords that the client writes (“Message received” trigger)) OR you can configure the bot without a template on the “Any new conversation” trigger (which means that the bot will send a standard template ONLY during the FIRST contact of a client with your company via WhatsApp chat).
In this example, we will choose the template “Set up actions based on the words in a client’s message” (4).
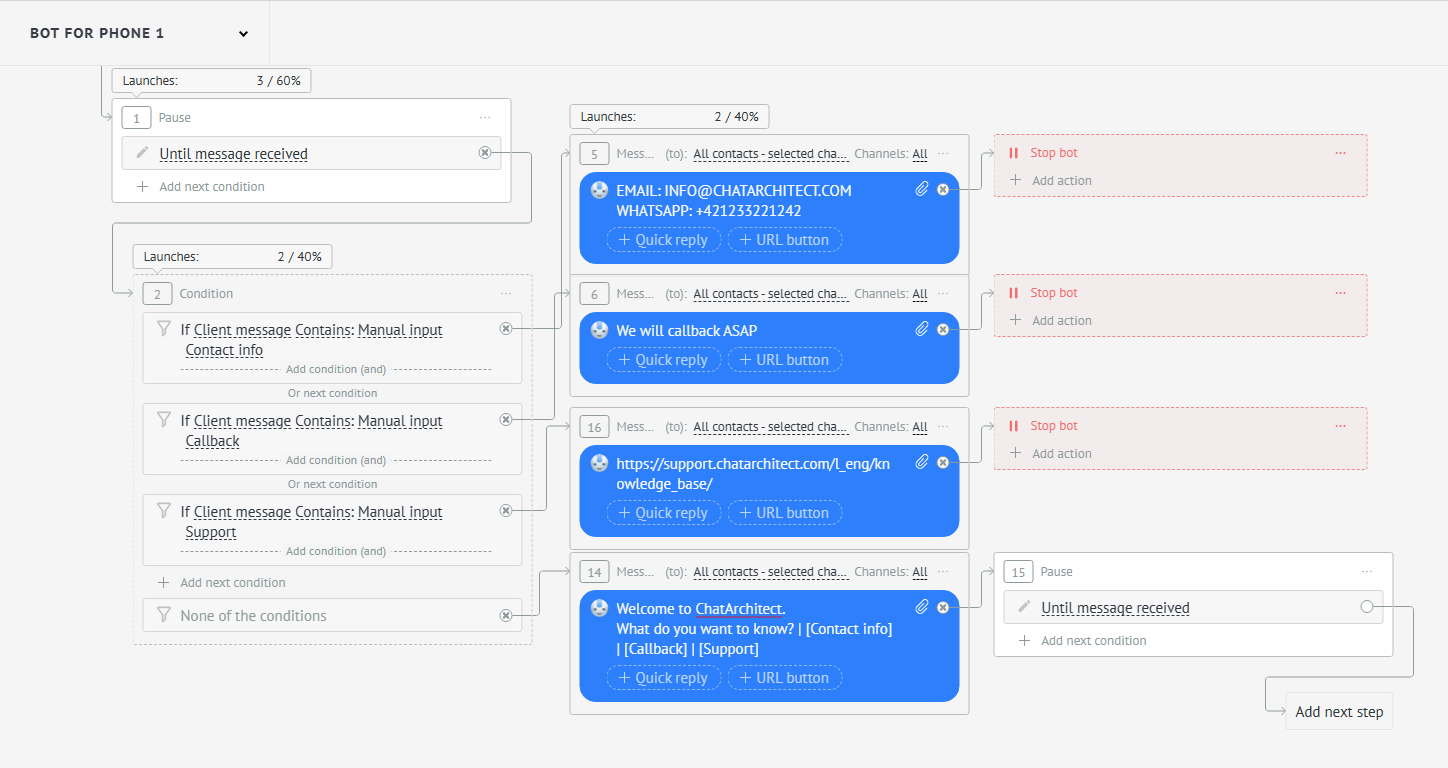
3.3 Set up the SalesBot script for the first phone as follows and click the “Save” button:
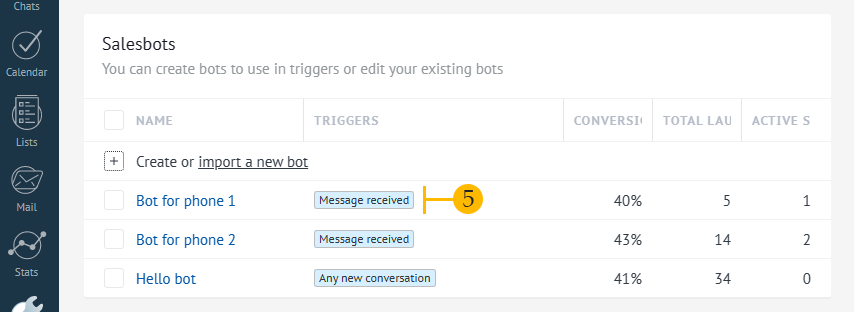
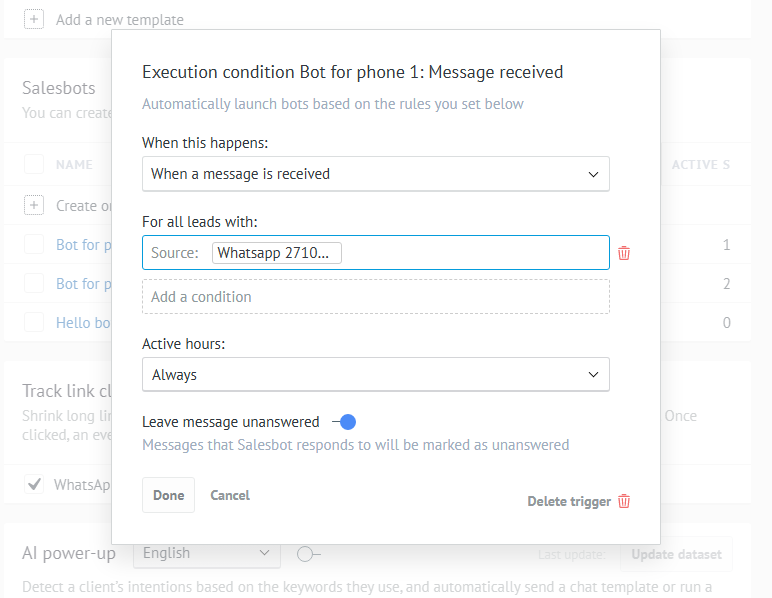
3.4 Now click on the trigger “Message received” (5)
3.5 In the pop-up window, in the “For all leads with” field, select “Source” -> Your first phone number and click the “Done” button
3.6 We do steps 3.1-3.5 for the second bot that will listen to the second number. But of course, in step 3.5, select your second number, and in step 3.3, specify the texts for the second Salesbot.
As a result, we will get the following: