In this instruction you will learn how to set up a simple Salebot.pro bot that will auto answer on your clients WhatsApp.
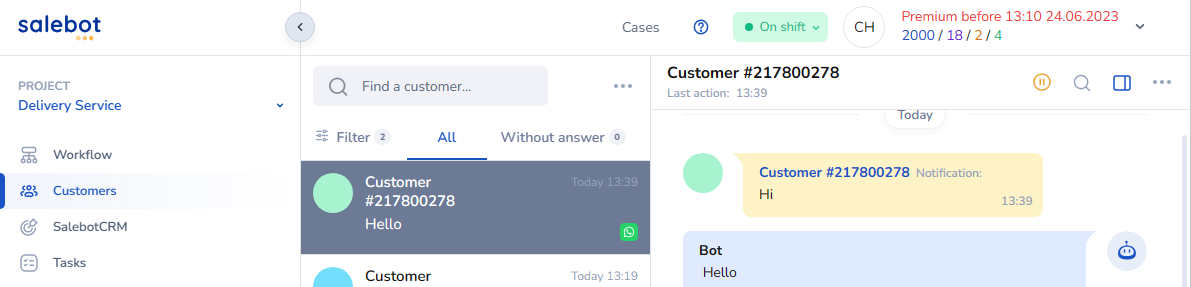
After all steps are done you should get next result:
Step by Step guide
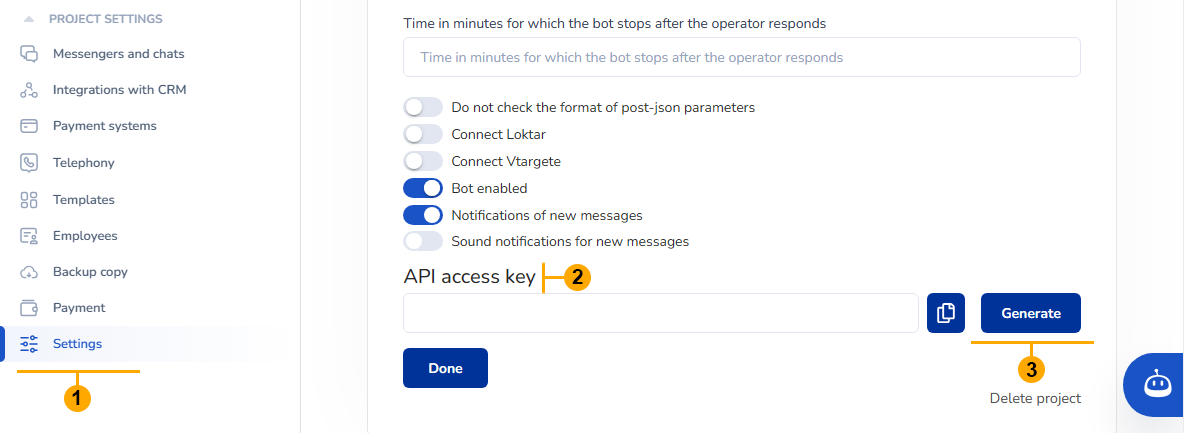
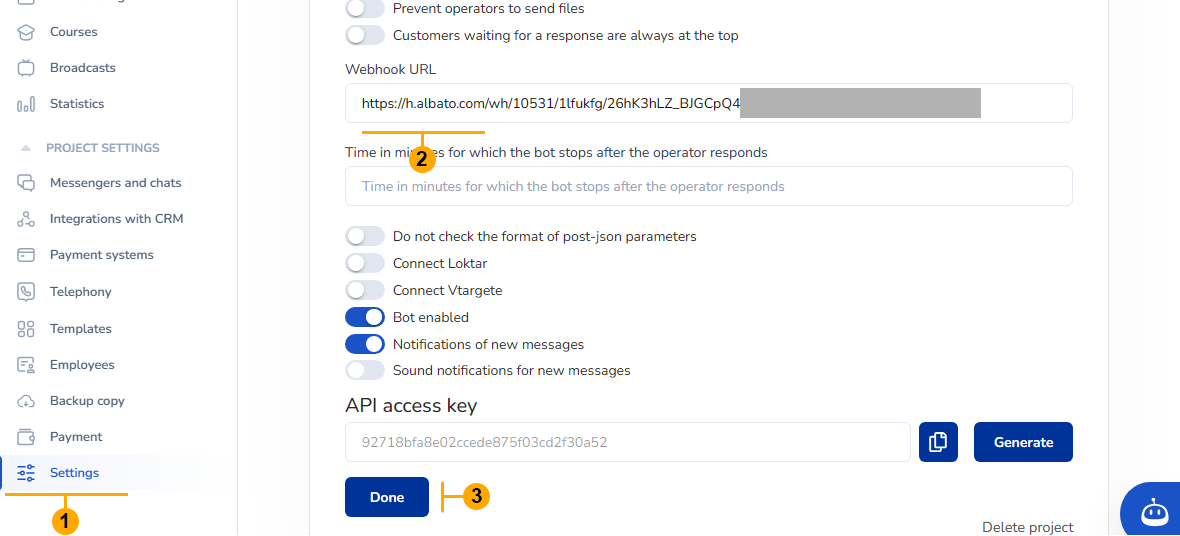
1. Go to your Salebot.pro account. Open project “Settings” (1). Find API key field (2) and press “Generate” button (3) after that copy generated key.
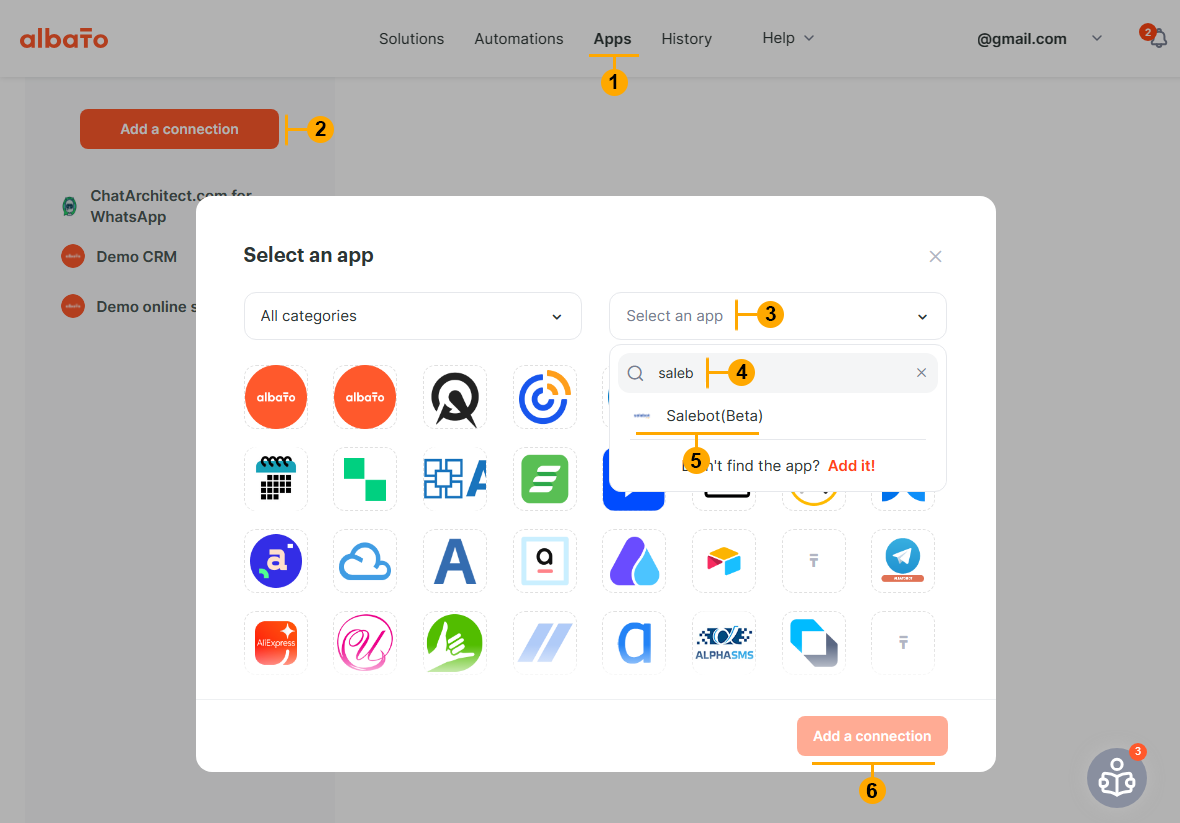
2. Go to your Albato account. Go to “Apps” page (1). Press “Add a connection” button (2). Click on “Select an App” field (3). Type “salebot” (4). Select app (5). Press “Add a connection button” (6)
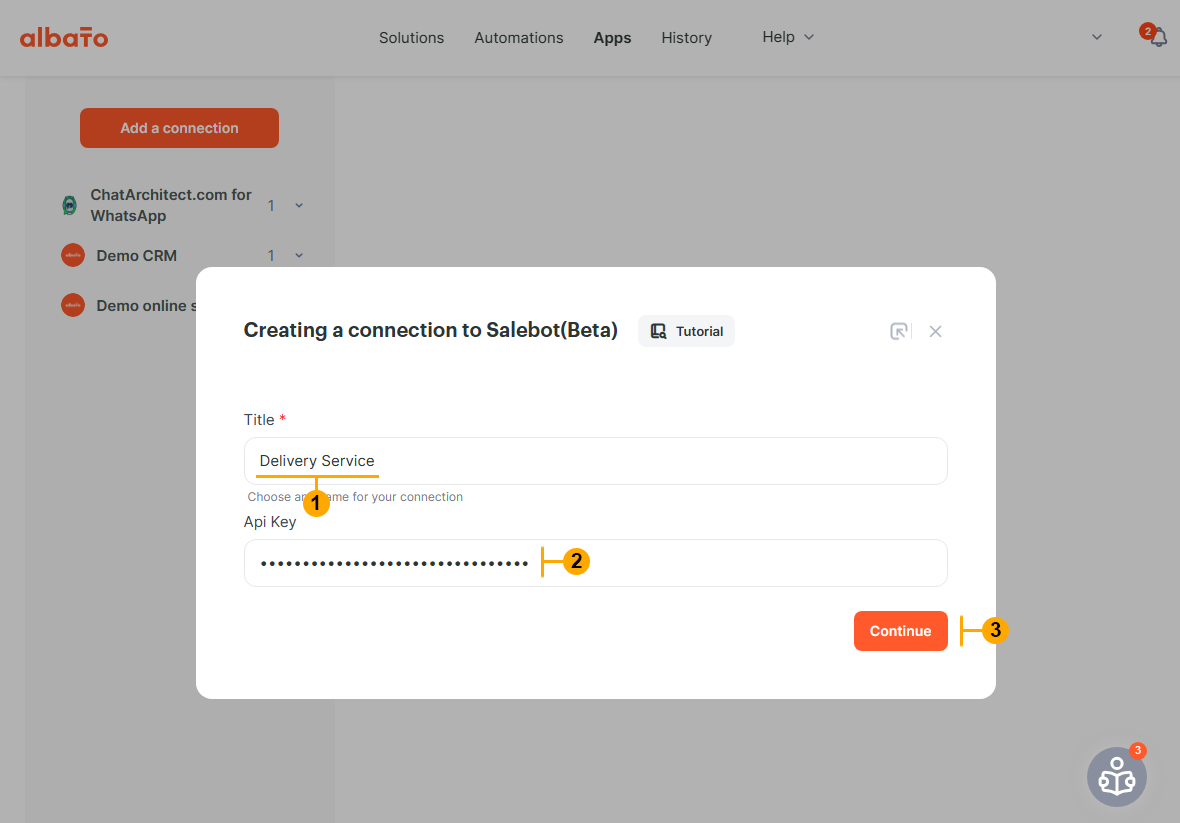
3. In the appeared window type Title for your project (1). Paste your Salebot.pro API key that you copied on “Step 1” (2). Press “Continue” button (3)
4. After “Step 3” Albato will create a Webhook URL (1). Press button (2) to copy this URL

5. Go to your Salebot.pro account. Open project “Settings” (1). Find “Webhook URL” field (2) and paste your Albato webhook from “Step 4”. Press “Done” button (3)
6. Go to your Albato account. Go to “Apps” page (1). Press “Add a connection” button (2). Click on “Select an App” field (3). Type “whatsapp” (4). Select “Chatarchitect.com for WhatsApp” app (5). Press “Add a connection button” (6)

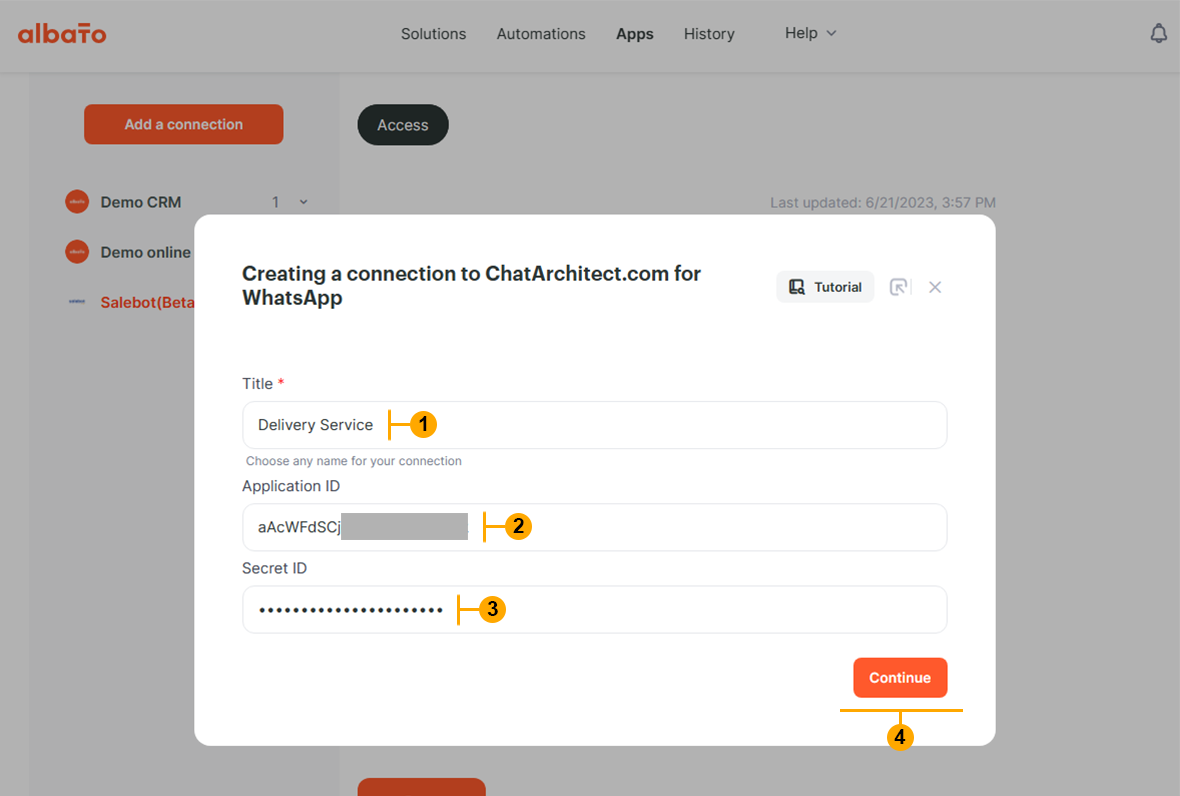
7. In the appeared window type Title for your project (1). Paste your “Application ID” (2) and “Secret ID” (3). Press “Continue” button (4).
NOTE: To get your “Application ID” and “Secret ID” please write to our customers support https://wa.me/421233221242
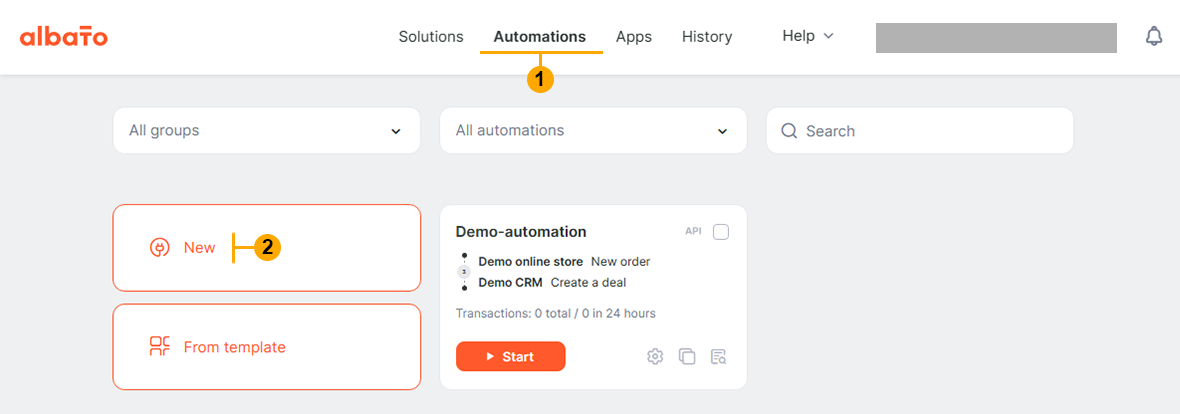
8. Create the first automation in Albato to receive messages from WhatsApp and send them to Salebot.pro. Go to Albato “Automations” page (1) and pres “New” button (2)
8.1 Press button (1) to select an App which sends data

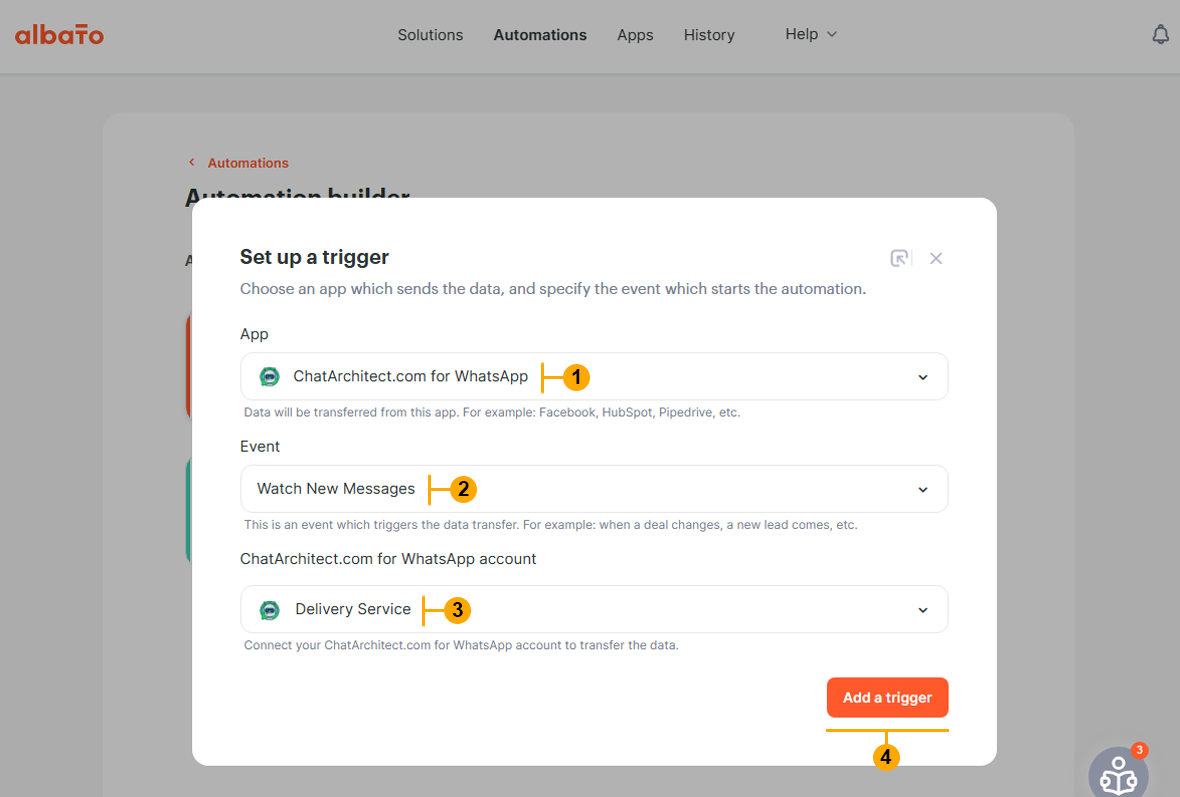
8.2 Make selections (1), (2), (3) and press “Add a trigger” button (4)
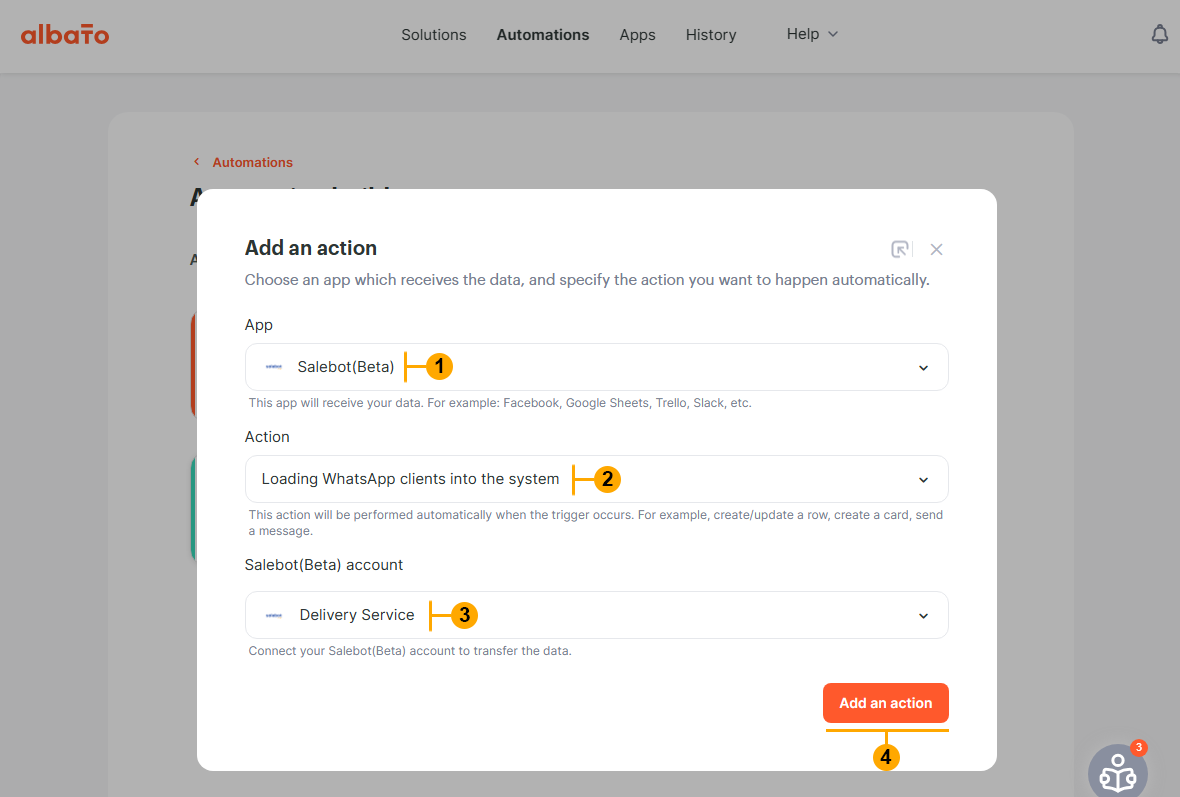
8.3 Press button (2) to select an App which receives data
8.4 Make selections (1), (2), (3) and press “Add an action” button (4)
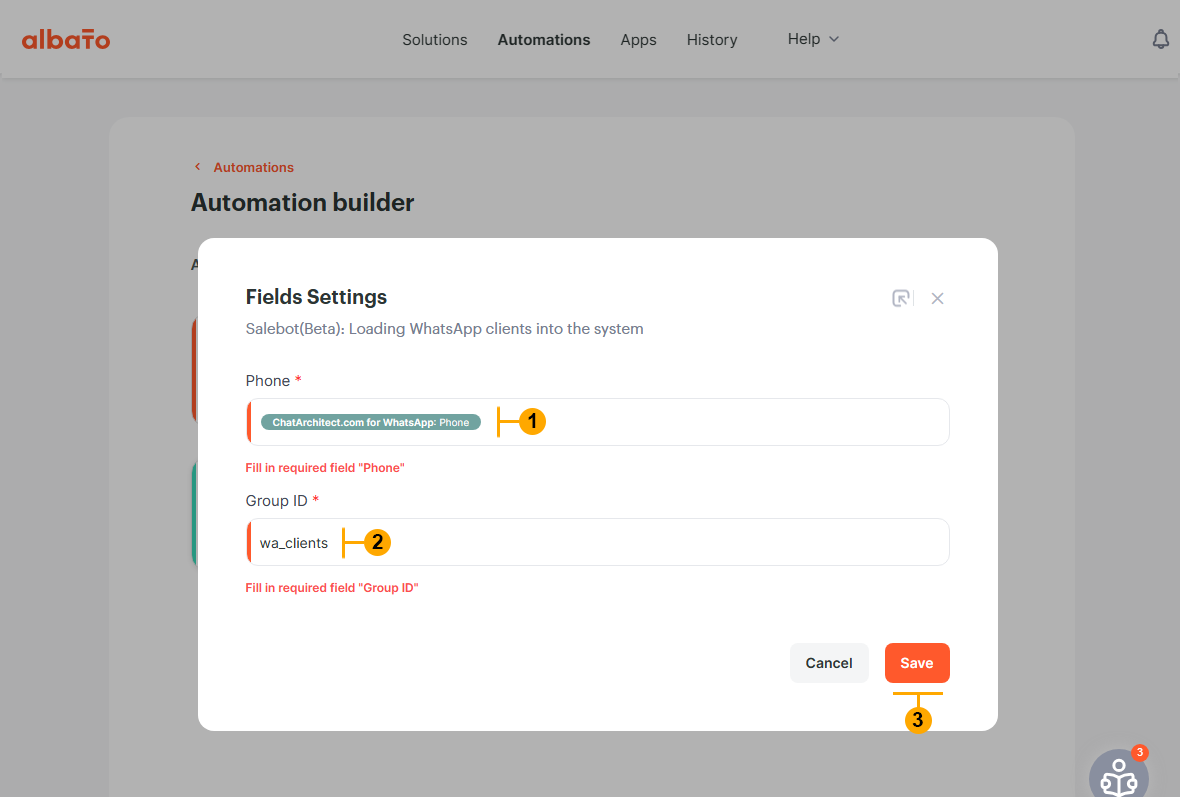
8.5 In the appeared window make selection in “Phone” field like on screenshot (1). After that type “Group ID” (2) and press “Save” button (3)
NOTE: Name of “Group ID” can be any you want.
8.6 Now you need to add an action. Press “Plus” (+) and then press “Action” button (1)

8.7 Make selections (1), (2), (3) and press “Add an action” button (4)

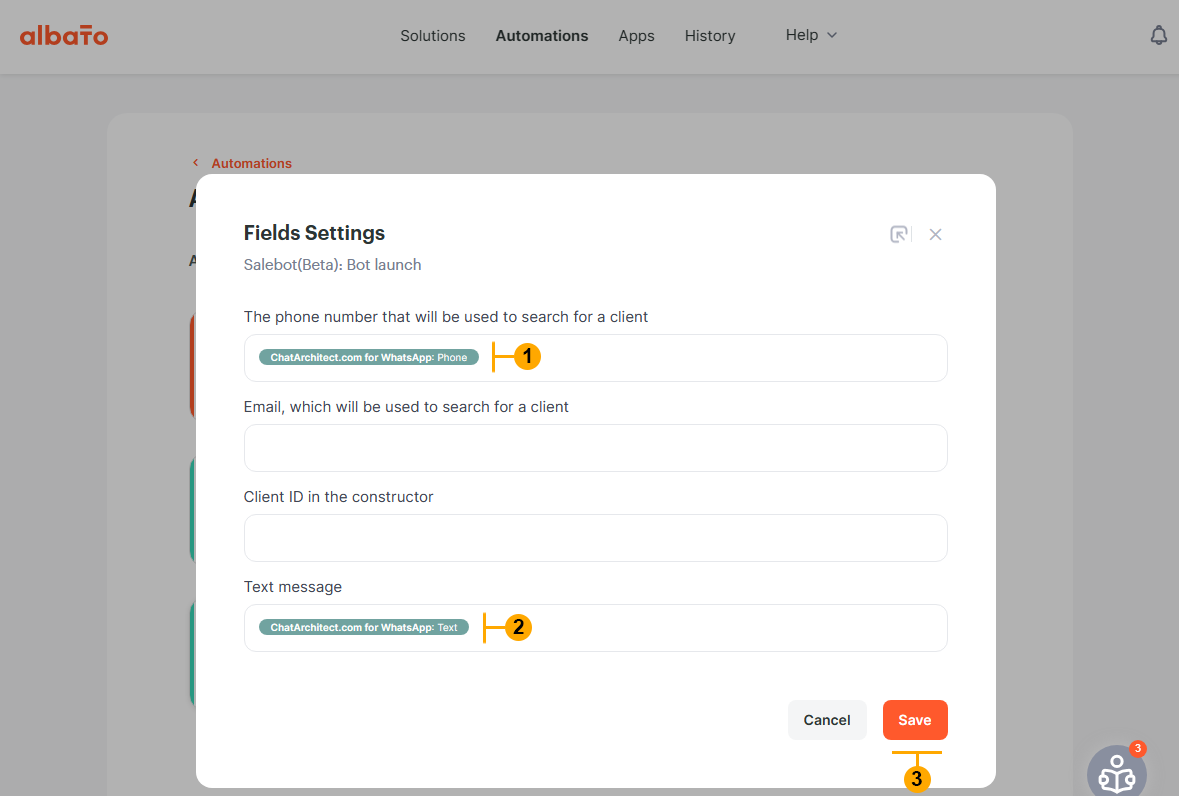
8.8 In the window that appears after “Step 8.7” make next selections (1), (2) and press “Save” button (3)
9. Create the second automation in Albato to receive messages from Salebot.pro and send them to WhatsApp. Go to Albato “Automations” page and press “New” button. Same as in “Step 8”
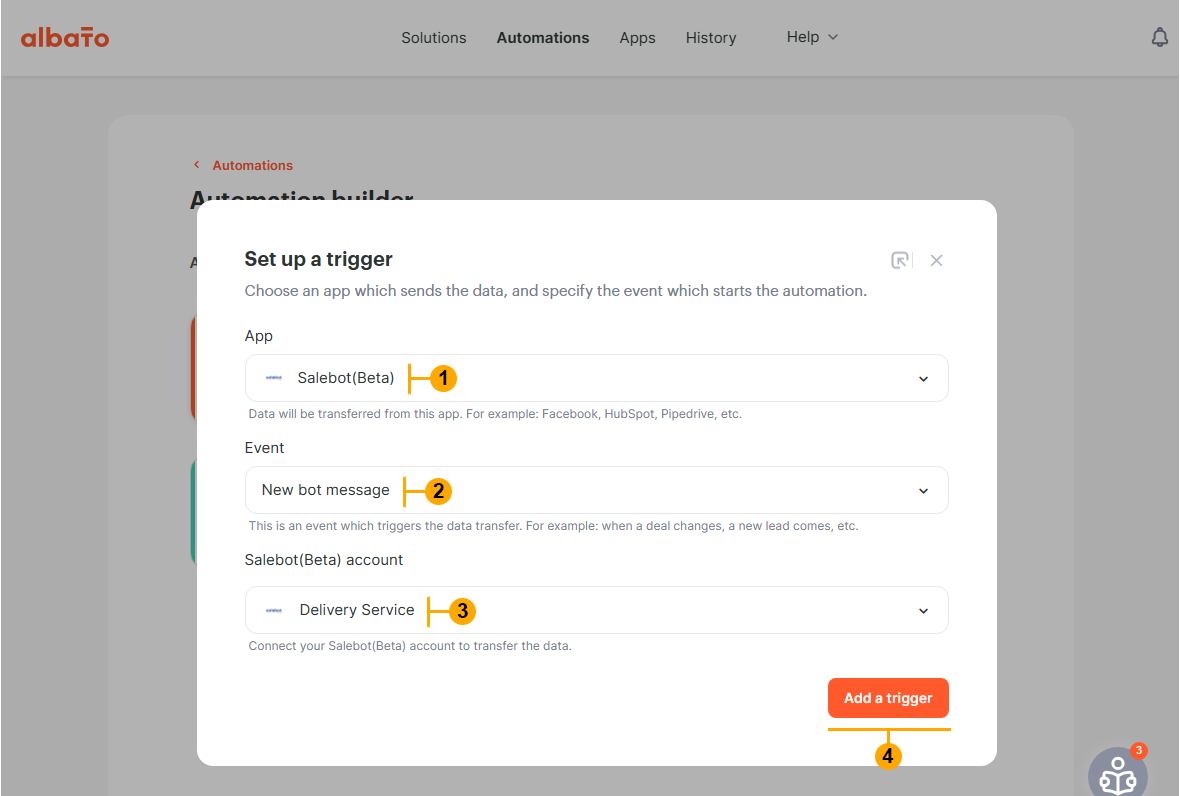
9.1 Press button (1) to select an App which sends data.
9.2 Make selections (1), (2), (3) and press “Add a trigger” button (4)
9.3 Press button (2) from step 9.1 to “Select an app which receives the data”. Make selections (1), (2), (3) and press “Add a trigger” button (4)

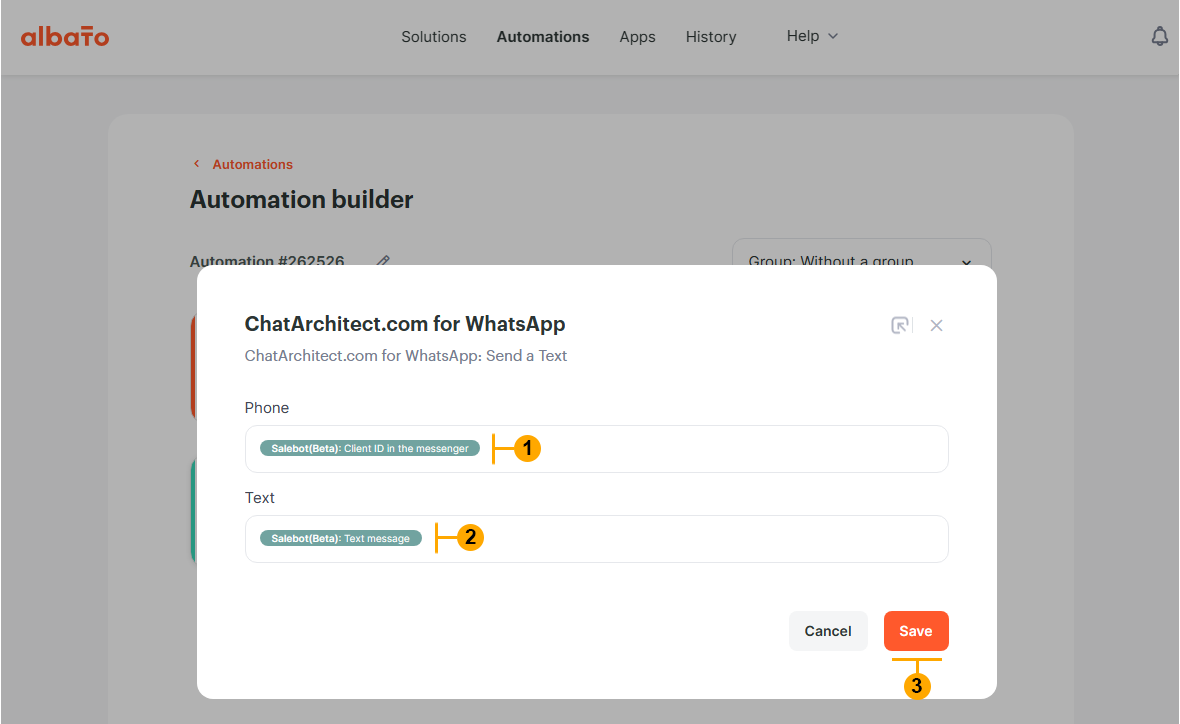
9.4 In the next appeared window make selections (1), (2) and press “Save” button (3)
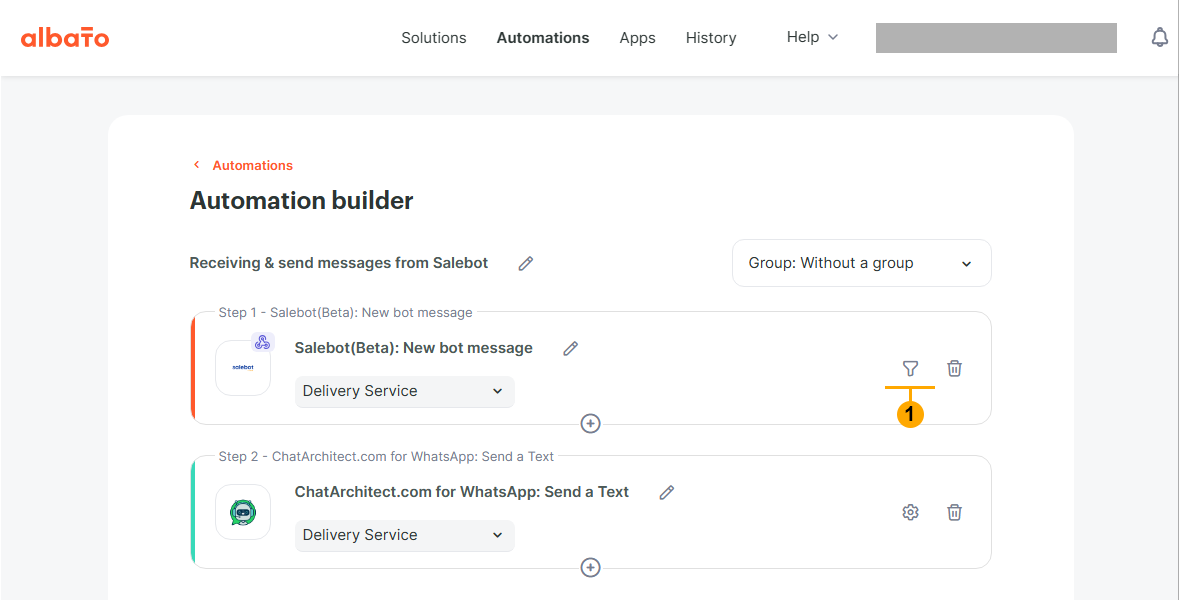
9.5 Now you need to adjust the filter to process only messages from Salebot.pro bot. To do this press “filter” button (1)
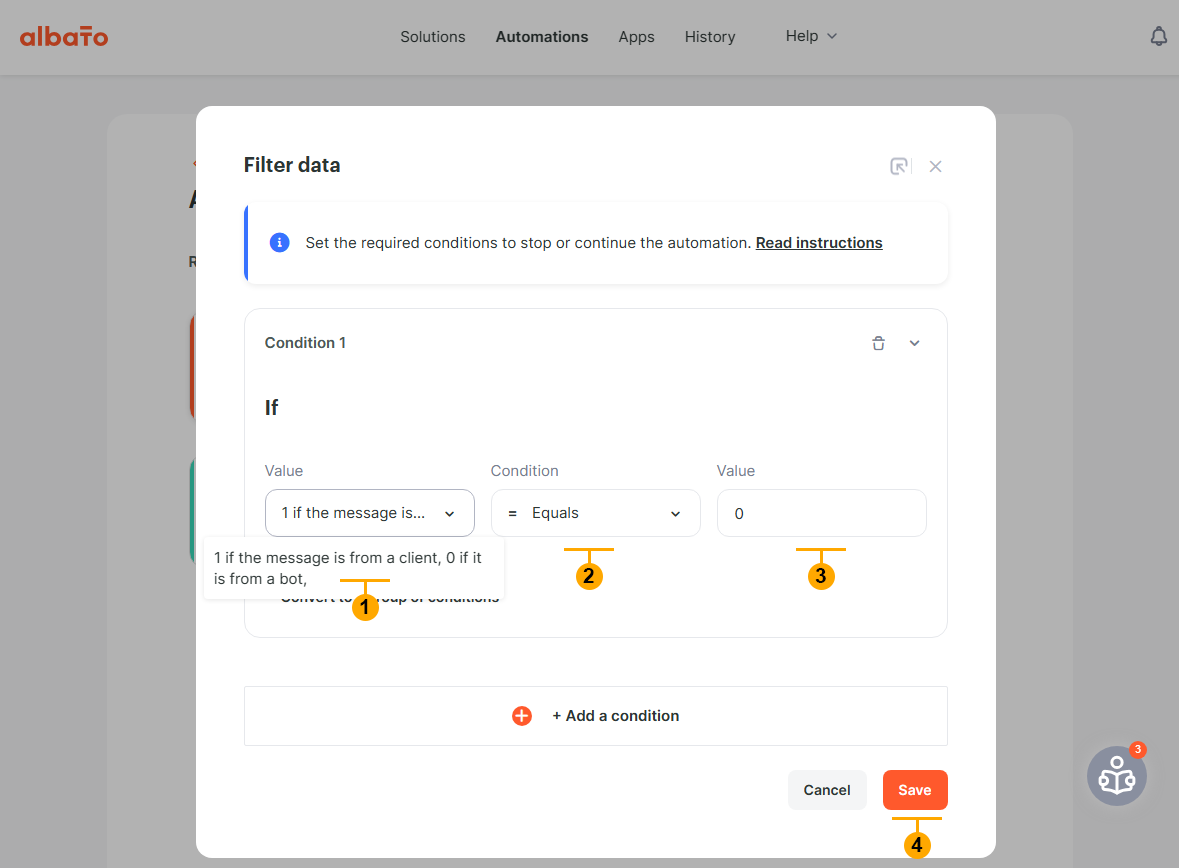
9.6 Adjust filter as shown below (1), (2), (3) and press “Save” button (4)
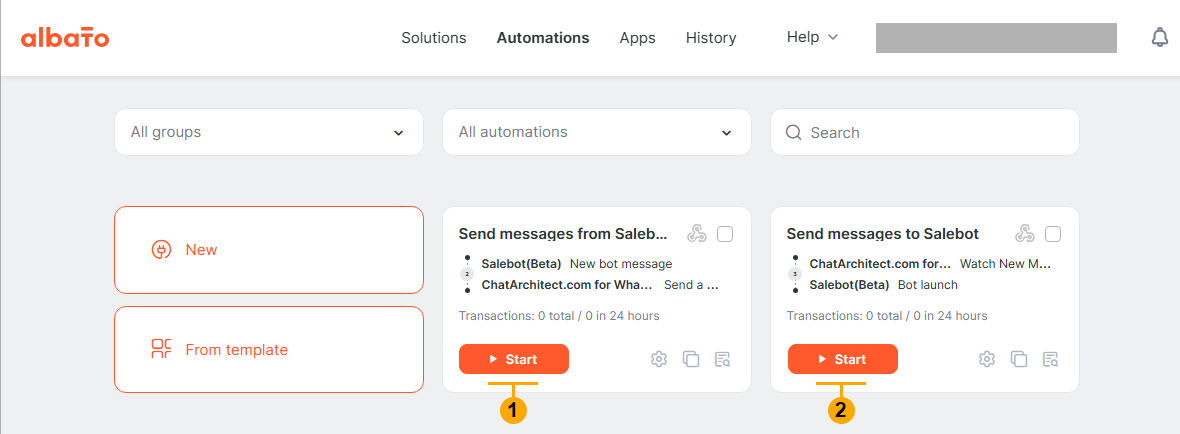
10 Go to “Automations” page and press the “Start” buttons on both automations (1), (2)
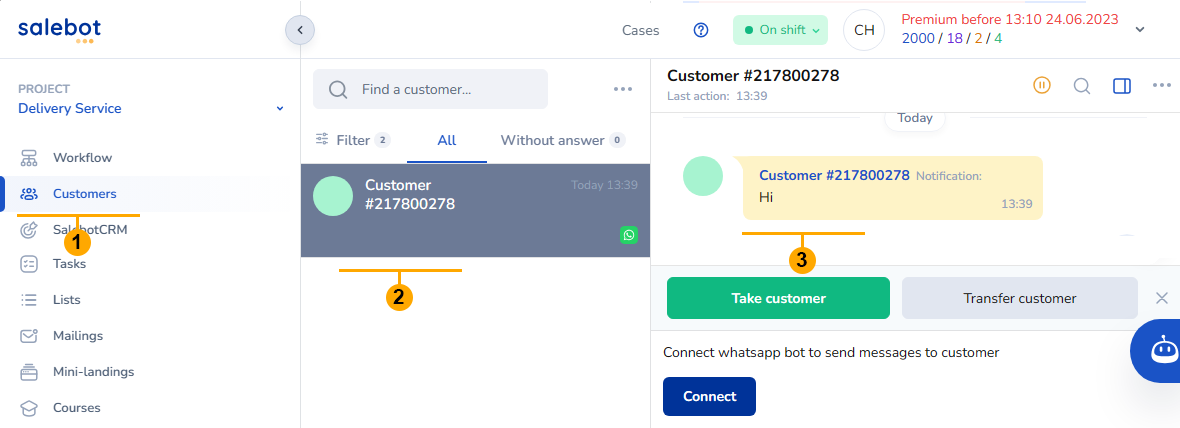
11. Write to your WhatsApp number to test connection. You should receive your message in the Salebot.pro “Customers” section.
12. Configure Salebot.pro workflow like on screenshot below:

13. Write to your phone number keyword “Hi”. After some delay bot must reply “Hello”