# WhatsApp for HubSpot

<span style="font-size:16px;"><span style="font-size:20px;">HubSpot is a specially developed system for your business that gives you the ability to send emails, communicate directly with customers, keep track of company data.  
Connecting HubSpot and ChatArchitect synchronizes your contacts and speeds up the process of interaction with the client.  
  
After connecting, you will be able to customize your account according to your needs, as well as contact any of your clients.  
Follow the instructions to set everything up correctly and make it easier for yourself to interact with the program in the future.</span><span style="font-size:24px;">  
</span>**<span style="font-size:24px;">  
  
Installation instruction<span style="font-size:20px;">  
  
</span></span>**<span style="font-size:20px;">  
 **1.** First of all, install our application via the link (first, log in to your HubSpot account, then enter the keys that we will send you after the connection is completed)  
</span>[<span style="font-size:20px;">https://wa.chatarchitect.com/email-hubspot/</span>  
  ](https://wa.chatarchitect.com/email-hubspot/)</span>

<span style="font-size:16px;"><span style="font-size:20px;">**2.** Then enter the keys that we sent you  
  
</span></span>

<figure id="bkmrk--1">![fd0fb93ddbdd568fad8b32ce4474146f.jpg](https://bookstack-support-u7942.vm.elestio.app/uploads/images/gallery/2026-03/embedded-image-j1kud9ou.jpeg)</figure><span style="font-size:16px;"><span style="font-size:20px;"><span style="font-size:20px;">****
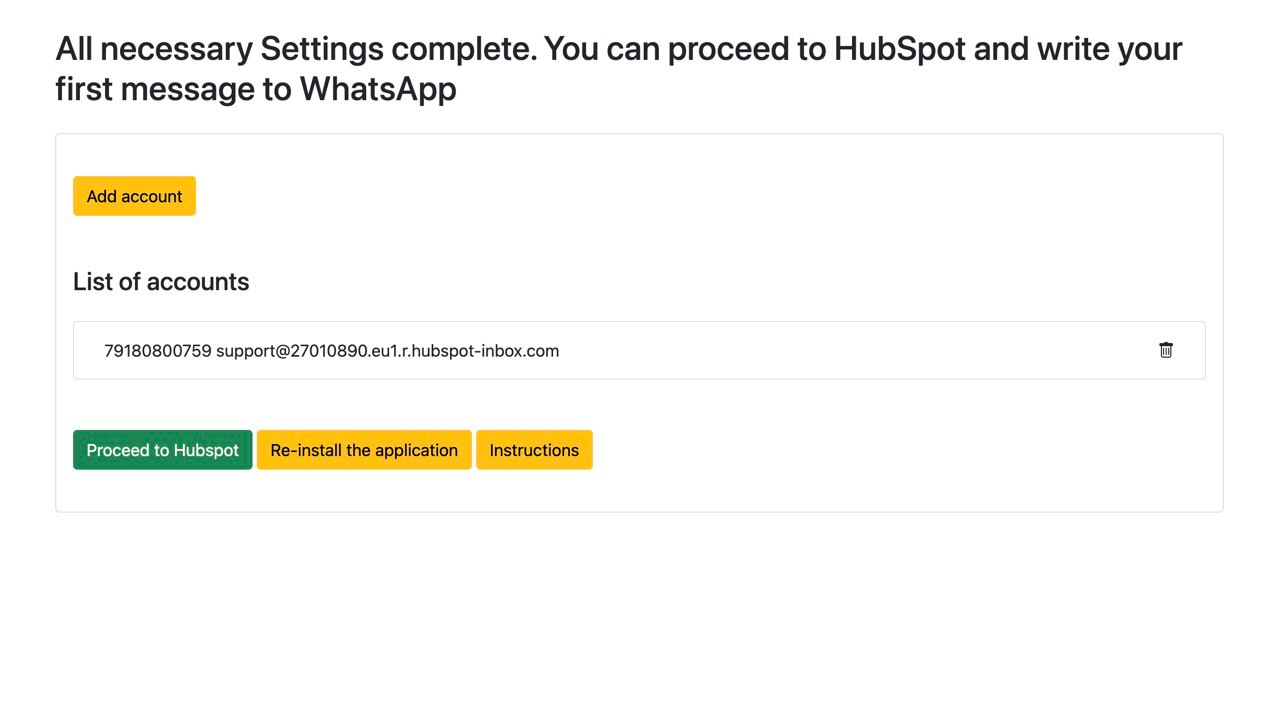
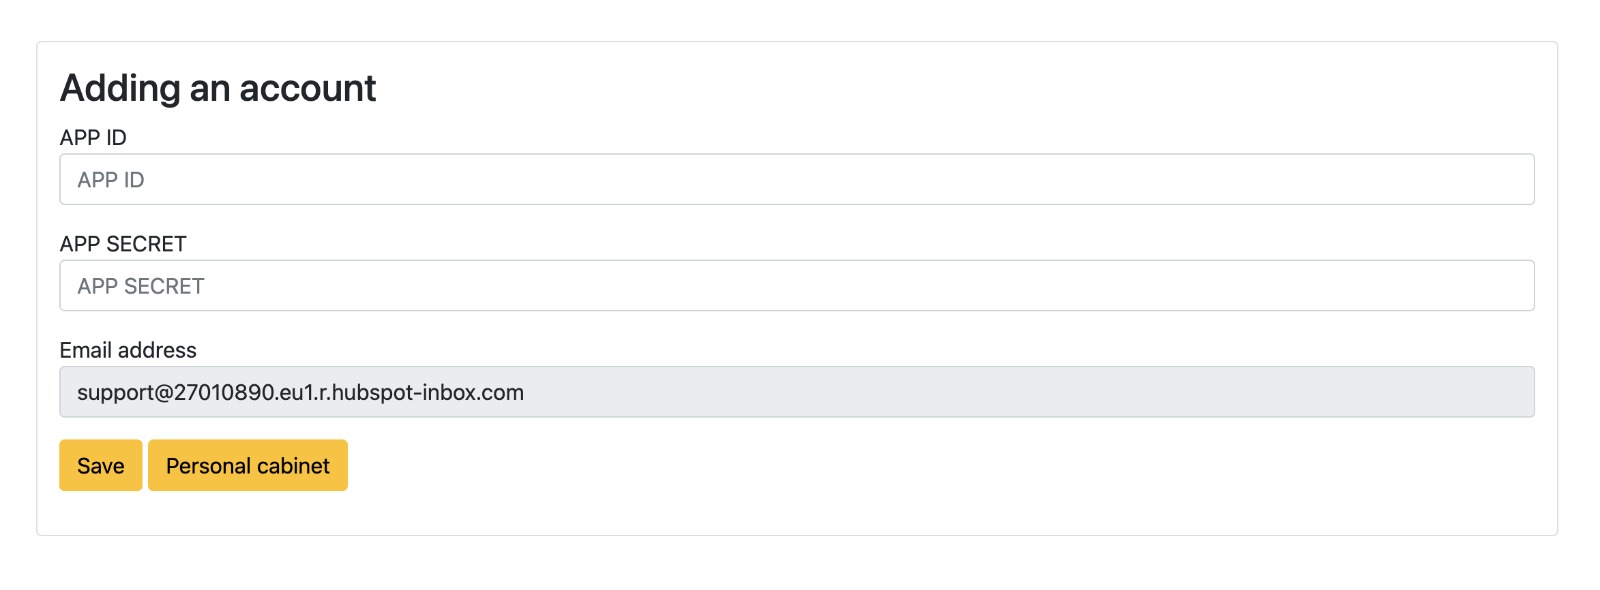
3.**** After connection is completed, click "Proceed to HubSpot" button  
  
</span></span></span>

<figure id="bkmrk--2">![d6561ebef6f8a502cb6f3c1c394b21a1.png](https://bookstack-support-u7942.vm.elestio.app/uploads/images/gallery/2026-03/embedded-image-lzn5baop.png)</figure><span style="font-size:16px;"><span style="font-size:20px;"><span style="font-size:20px;"><span style="font-size:20px;">  
  
  
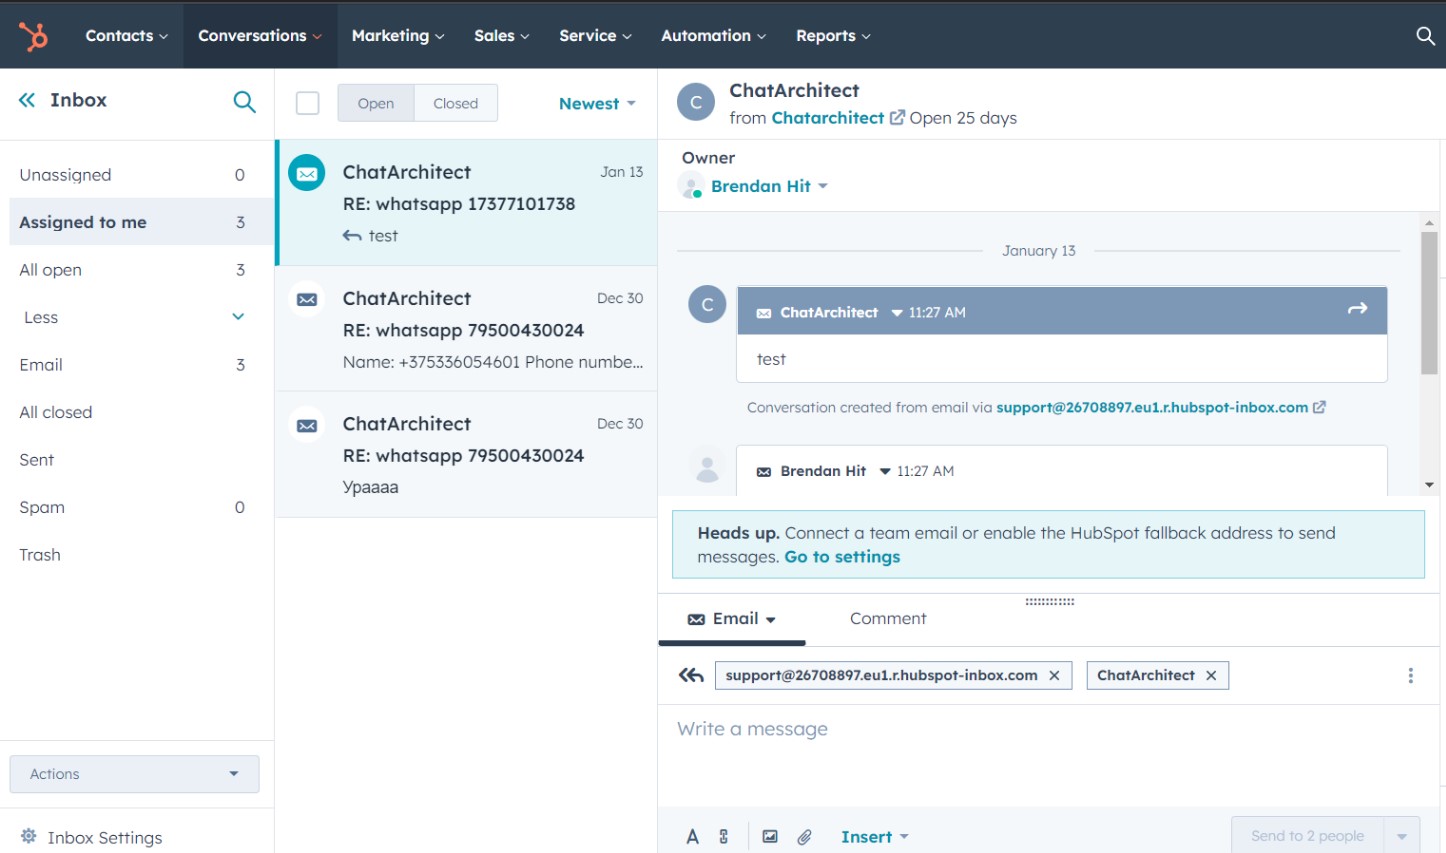
**4.**** After installation, go to the tab Conversations - Inbox</span>  
  
</span></span></span>

<figure id="bkmrk--3">![09ebdf9d2dfb2edba6b1ac5b32a67391.jpg](https://bookstack-support-u7942.vm.elestio.app/uploads/images/gallery/2026-03/embedded-image-upout0gj.jpeg)</figure><span style="font-size:16px;"><span style="font-size:20px;"> **
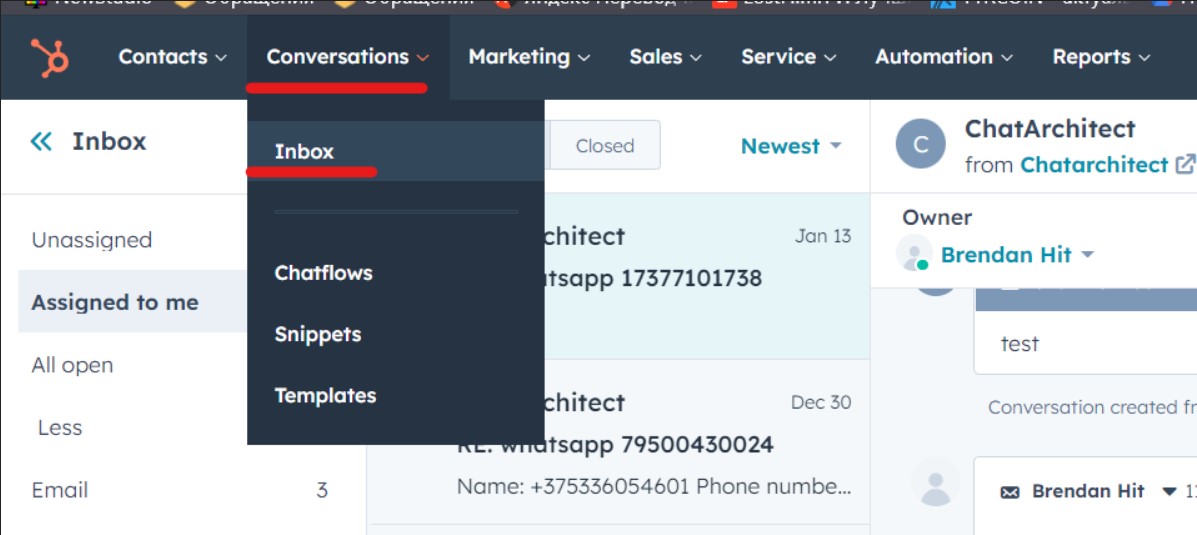
5.** Next, click on Inbox settings</span>  
  
</span>

<figure id="bkmrk--4">![9761027c8dcfb6a4db14795771121db3.jpg](https://bookstack-support-u7942.vm.elestio.app/uploads/images/gallery/2026-03/embedded-image-cdcuzp1e.jpeg)</figure><span style="font-size:16px;"><span style="font-size:20px;"> **
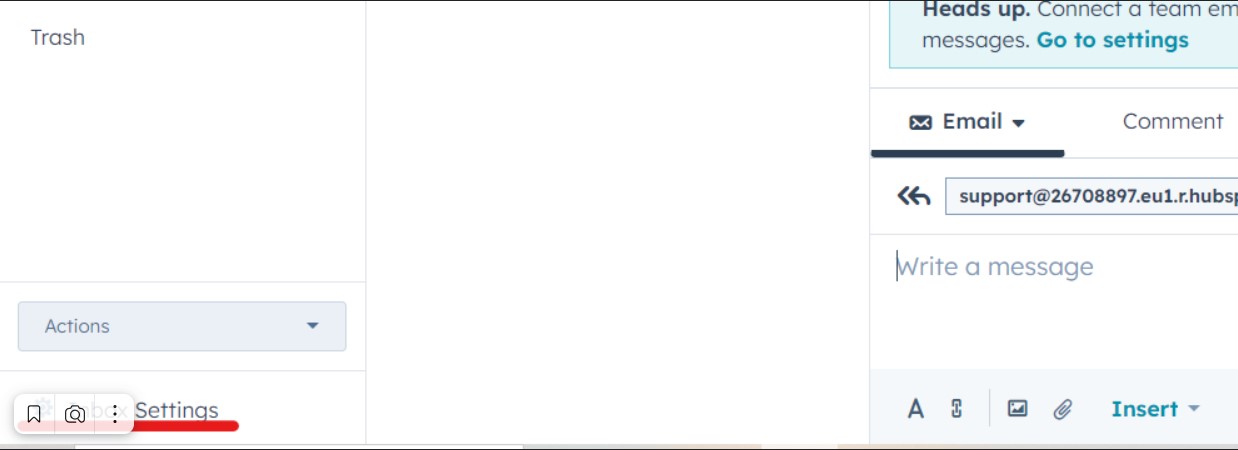
6.** In the HubSpot fallback email subsection, click Edit</span>  
  
</span>

<figure id="bkmrk--5">![aaf485095239ca2ca0135fc6b7baf203.jpg](https://bookstack-support-u7942.vm.elestio.app/uploads/images/gallery/2026-03/embedded-image-pq9y3daa.jpeg)</figure><span style="font-size:16px;"><span style="font-size:20px;"> **
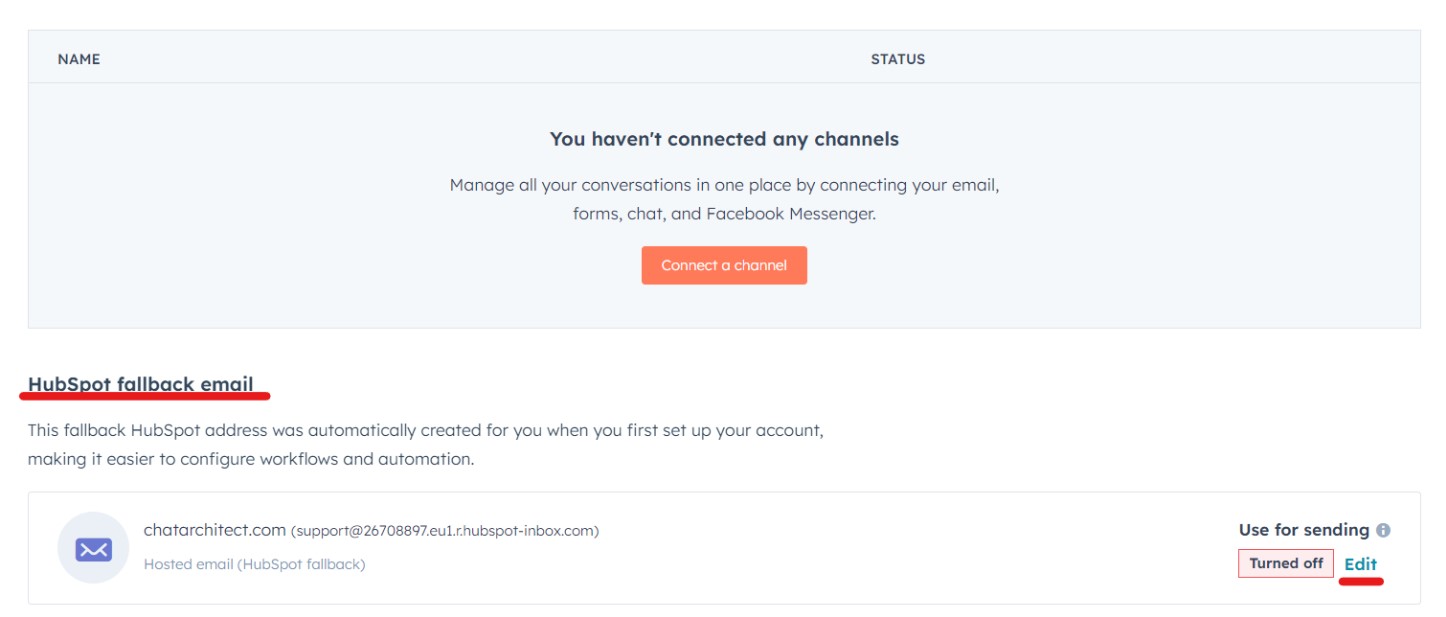
7.** Check the box Use the HubSpot email for sending messages and save it
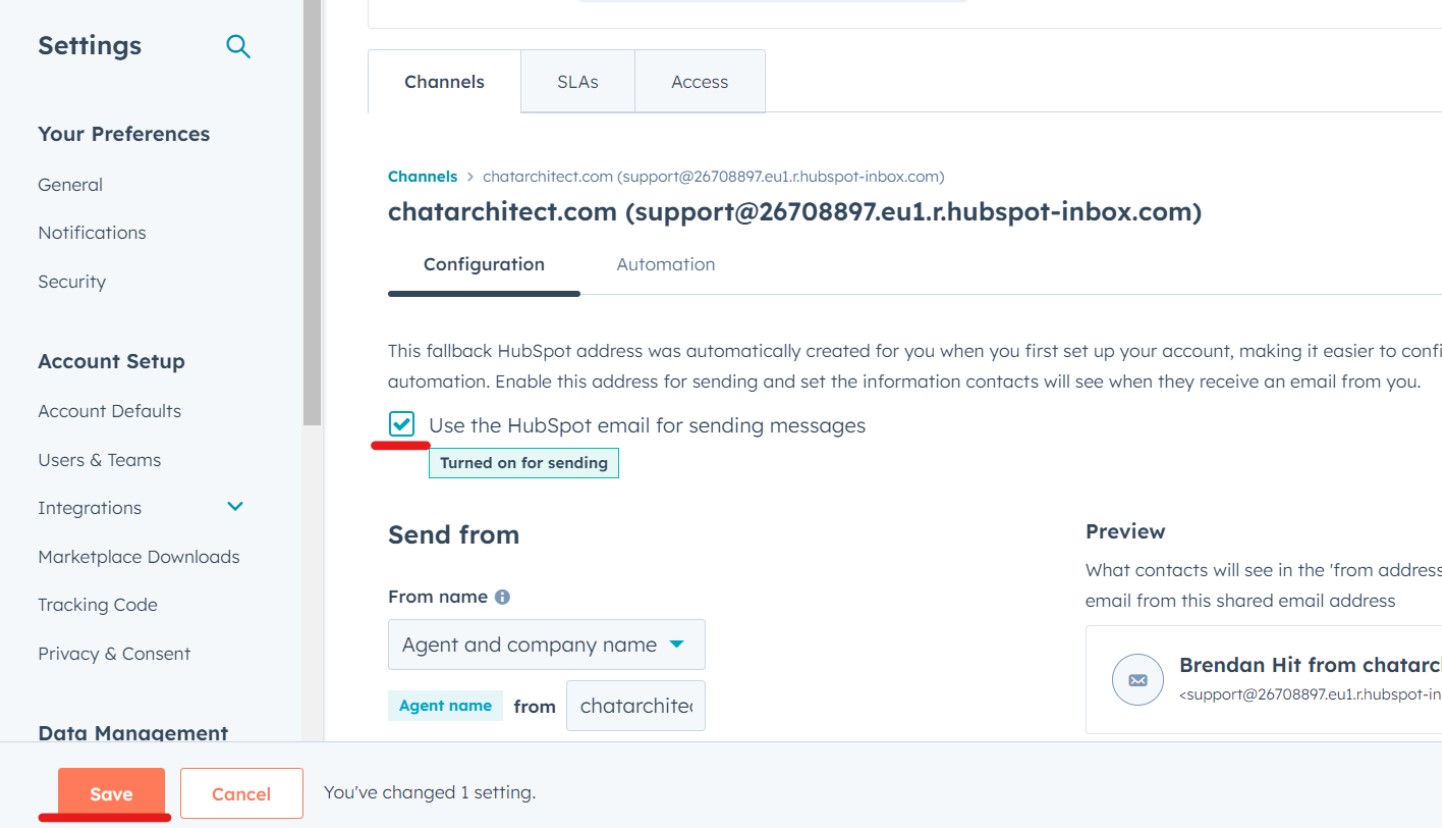
 </span>  
  
</span>

<figure id="bkmrk--6">![3ad795a37cf2436f3a108265ad032098.jpg](https://bookstack-support-u7942.vm.elestio.app/uploads/images/gallery/2026-03/embedded-image-x0psn3aa.jpeg)</figure><span style="font-size:16px;"><span style="font-size:20px;"> **8.** </span>Now you can check your incoming messages. To do this, send a message to your number which you have linked to CRM. The message should appear in the "Conversations -&gt; Inbox tab"  
</span>

<figure id="bkmrk--7">**<span style="font-size:18px;">![b8311c3cb02408c8f9621a2385bfe0f1.jpg](https://bookstack-support-u7942.vm.elestio.app/uploads/images/gallery/2026-03/embedded-image-fye7eya4.jpeg)</span>**</figure><span style="font-size:18px;">**9.** </span><span style="font-size:16px;">To send messages via HubSpot follow these instructions [https://support.chatarchitect.com/l\_eng/knowledge\_base/item/298533?sid=63122](https://support.chatarchitect.com/l_eng/knowledge_base/item/298533?sid=63122)</span>